UK SHIP, NO TAX

Monday 29 December 2014

Install TIS2000 software for GM Tech2 scan tool

What the function of TIS2000 software CD?
GM Tech2 is a standalone scan tool mainly used for diagnostic function, but with the additional TIS2000 software dongle, it is possible to carry out ECU programming for GM vehicle models (after 2007).

Operating system:
A laptop with COM port running Windows XP operating system

NOTE: PCs validated to function with all Tech line applications including TIS Service Programming System (SPS). Other laptops may not support SPS or communicate properly with the Tech 2 and will not be supported for hardware communication issues.
TIS2000 for GM Tech2 scanner
Step-by-step TIS2000 software dongle installation:
1) Insert TIS2000 software CD into the laptop

2) Install the setup driver in the CD

3) Select Activator. Select first one Activator hardware key

4) Load DATA DVD (tis2000+data+0802) to run TIS200 on desktop after compete install the setup. TIS2000 will update the data automatically.

5) Find out and locate SuperPro.dll file in TIS2000 crackfile folder after update data and copy the SuperPro.dll file to “C:Program filescosidsbin”

6) Then run TSI2000 software

7) Connect GM Tech2 device with computer

8) Start ECU programming and follow the windows prompts.
If you order GM Tech2 scanner with Saab software, you’d better choose Saab TIS2000 CD with USB key.

Thursday 18 December 2014

New Truck Diagnostic 88890300 Vocom Interface

88890300 Vocom Interface supports the repair and diagnostic process for Volvo, Renault, UD and Mack Truck, can update online. It was developed to make repair shop tasks easier and more efficient. TT can be used in the repair shop, out in the field, at the roadside, or during test drives.

88890300 Vocom Interface Sofware:
Software version: PTT1.12/2.40, software come with package for free, this software must installed on Windows XP system computer. Support Multi-languages.
Software version: PTT2.03/3.02. This is latest software version. This software need additional purchase, price is 230usd. Support install on Windows 7, support multi-languages.

Volvo 88890300 Vocom Interface is a diagnostics application that covers the whole repair process through the use of plug-ins. With Volvo 88890300 Vocom Interface you can diagnose, test, calibrate, and program a product. A product could be a vehicle, engine, or a machine. Volvo 88890300 Vocom Interface also provide functions for updating the tool, communication with the product, and other external applications. The set of plug-ins, user authorizations, and available languages is adjustable to provide every user with what they need.

88890300 Vocom Interface Supported companies and electrical systems:

Volvo Trucks (Older electrical system, Vehicle electronics '98, V2, V3, V4);
Volvo Buses (Conventional, Multiplexed, Multiplexed v2, Multiplexed v3);
Volvo Construction Equipment;
Volvo Penta (VERSION2);
Volvo OEM Component Customer (VERSION2);
Mack Trucks (V-MAC I/II/III, ITC, IV, IV+);
Renault Trucks (VERSION2);
UD Trucks (VERSION2)

88890300 Vocom Interface Functions:

Identify a product.
View information history.
Diagnose a selected product.
Test a selected product.
Program a selected product.
Calibrate a selected product.
http://www.obdexpress.co.uk/wholesale/volvo-88890300-vocom-interface-renault-ud-mack-diagnose.html

Sunday 14 December 2014

Toyota Techstream "Software Registration" error

1)
When register Toyota Techstream software (mangoose with new chip, Techstream 22pin, MINI VCI, Mangoose VCI), the system pops out the following error message:  “To register software, click on the Software Registration button below. If you are unable to access the software registration web page, contact Techstream support. For Teachstream support, click the Support Information button below”. (shown as picture below)
Toyota Techstream Software Registration error
Solution:
Go to
C:\Program Files\Toyota Diagnostics\Techstream\Env\IT3System.ini
Change
TISFunction=1 to TISFunction=0
Save
2)
When access to the Software Registration page, the system pops out an error message:  "Network Connection is unavailable. A network connection is required to use TechStream. You can only connect 25 more times before software registration is required."
Solution:
Replace the Original MainMenu.exe file in directory
C:\Program Files\Toyota Diagnostics\Techstream\bin\
(Backup your Original file on your computer or Rename it...)
Start your Techstream and enter these Keys to activate your Techstream:
EU = abbe703c18739c897dae24400b78aeb530001302010241
NA = b52a2344103a02cf15fd78cbe5cbc0ab30001302010241
JP = f9db6f52a2df50424270ce506cdd645530001302010241
OTHER = 076125d9a1a47f6a39015e59208499dc30001302010241
For how to activate Toyota Techstream software, please check the video here:
https://www.youtube.com/watch?v=X1uS-rLajKc
NOTE: DO NOT change the "User Type" when you will run your TIS  Techstream for first time! Leave it with the Default option. "Official" Dealer/Repairer with other words...
Hardware ID = 55555555555555555555555555555555
Software ID = 8.00.034
Date Start = 01-02-2013
Days To Expire = 3000

Tuesday 9 December 2014

OBD365 Christmas Sale with 12 Best Deals

From 4th to 14th December, OBD365 is offering crazy Christmas sale covering storewide products including basic OBDII scanners, car diagnostic tools and software, car key programmers, engine timing tools, ECU chip tuning tools and odometer programmers.
As there are over 1,000 products on our website, you may be giddying looking for a best buy. Here OBD365 has compiled a list of 12 best deals during the period for your reference:
OBD365 crazy Christmas sale
You can grab Nissan NSPC001 Pin Code Calculator for only $149 and Launch CRP for only $129. Plus, if your order is over 100USD, you will get an efficient and hot selling ELM327 scanner for free!
http://www.findobd2.com

Thursday 27 November 2014

BMW ICOM A2+B+C softwares difference

BMW ICOM is the most professional tool for BMW vehicles after 2009. It can work on all series BMW and MINI including diagnose and programming function.
There are two version 2014.9 BMW ICOM A2+B+C on your website, what is the difference?
For BMW ICOM A2+B+C, it have two version, item number SS130-9 (the expensive one) and SS130-9B (the cheaper one).
For SS130-9, it has two system: BMW system + window xp (the engineer software version). When you open the software, if you choose isid, then you will see BMW system. If you need to use engineer software version, then choose to enter windowxp bmw esys ncs nipa.
bmw-icom-a2+b+c
For SS130-9B, it only has win7 interface. If you want diagnose, then choose diagnose, if you want programming, then choose programming function, if you want engineer software version, then choose to enter it.
bmw-icom-a2+b+c

Monday 17 November 2014

How to Update TM100 V2.0

TM100 key programmer has newly upgraded to V2.0. The newest version enjoys some new figures.
TM100 key programmer
New feature of V2.0 TM100 key programmer:
1) Add MEGAMOS 13 copy function
2) Fix 8C chip copy bugs
3) Fix all ID13 keys generation problem
4) Fix key fob: VW module, Gower, 93C56 immo box without writing start interface.
5) Online activation. Automatically activated after connect the device
6) Online authorization
7) Online reading Magotan Security Bytes
8) Online crack Volvo 93C86 data
NOTE:
The system will ask for firmware update after upgraded to the V2.0. Do no disconnect the device during the firmware upgrade process.
How to copy ID13 Chip:
Enter chip identification, select MEGAMOS 13, put the original key into the coil, read data, place T5 chip, click write chip, then ID13 chip is generated
How to do online authorization:  
1) Make sure good network connection on the computer
2) Select "Tools" on the main menu and select "Install new module"
3) The system will upgrade online authorization automatically.
TM100 key programmer
TM100 key programmer has two formats optional, one with 62 module, another with basic module. For detail information, please check obd365.com.

http://jatc.metroblog.com/

Wednesday 5 November 2014

Setting up offline mode In Latest DAS Note and Activate

Setting up offline mode In Latest DAS Free Shipping View larger image Setting up offline mode In Latest DAS
Setting up offline mode In Latest DAS Fix Free Download
As you know the offline programming has been switched off on DAS beginning from DAS 012010. So now when you want to program a control unit for whatever reason you will need to go online to aftersales platform which of course will require a dealer login and a password and only then you will be allowed to program the control unit. And this will be possible only if your control unit contains the software version older than the software version available. If the software inside the control unit is the already latest one and you still need to program it you will get a message saying that "No newer software was found". (Soon there will be a solution how to avoid this message).

How to get the Setting up offline mode In Latest DAS activation ID:

1) After you install the software, you will see this, click this icon in the upper left corner: Attention, the ID on this box is wrong

Settomg up offline mode in latest das

2) After open this icon, you will see the right ID:
Latest DAS right ID
3) copy the ID and send it to us. we will resend you a license.

4) Decompress the license we send to you, and run it directly. Then this software will be ready for use.

Notes:

1. Be sure to disable/uninstall anti-virus software
Please note,anti-virus software can flag up this item software as having a virus. This is a false positive and is due to the software containing the application file. So Before setup the device software, please disable/uninstall anti-virus software or install a more reliable free virus scanner! Our this item software is completely safe and virus free and all other virus scanners confirm this.

If the software data is destroyed or lost because you forget to disable/uninstall anti-virus software, please contact our customer service, we arrange to resend you CD or send you the software via internet.

2. Required windows operation system is windows XP
Be sure to setup and run the device software under windows XP. Otherwise the device software and program can be broken or it will fail to work.

More car obd2 tools software at http://www.obd365.com

Tuesday 21 October 2014

SDD+JLR Mangoose setup instruction and note


Land Rover SDD+JLR Mangoose setup instruction and note
JLR mangoose v138
1. JLR J2534 Mongoose 134 readme

Land Rover SDD+Mongoose setup instruction and note:

Step 1: put into CD SDD 134
              Install SDD_DVD134_FULL.exe in the CD
              then install SDD_DVD134.01.exe
              Finally install SDD_DVD134.04.exe

Step 2: After complete setup the first step, put into CD SPA_DVD134
              Install SPA_DVD134_V0.exe
              Finally install VDF_J_DVD134_V5.exe

Step 3: after complete setup the second step, put into CD VDF_L_DVD134
             setup VDF_L_DVD134_V5.exe

Step 4: setup jlr134-license.exe, the password to extract the folder is: jlr134-license-software
              finally setup driver J2534_Mongoose_JLR_x86

Remark: the computer operating system must be Windows XP


2. OBD2 Tool JLR Mangoose ID and Password:

V131
User ID: JLRQ5013
Password: L405X152

V130:
User ID:  JLR9A8172
Password: L538X760

V129:
User ID:  JLR6A9129
Password: L316X351

Please must disconnect internet when you input this user name and password.
The software should install in Disk C://

Thursday 16 October 2014

Know Multi-Di@g Access J2534 and get activation code

Multi-di@g access is software on CD ROM and a VCI (vehicle communication Interface) can be used to communicate with the ecu's according to the J2534 & J2534-1 specifications. Besides ecu reprogramming, with the help of multi-diag access j2534 software, maintenance and repair operations can be done in just a few clicks without being an electronic expert. Equipped with multiply diagnostic functions, pass-thru device (j2534) has a very strong depths of data and is easily handling with that gives big benefits to it's user. In this post I will show you How to get multi-di@g J2534 Pass-Thru OBD2 Device activation code.
Multi-Di@g Access J2534
J2534 Pass-Thru OBD2 Device software version:
Multi-di@g office I-2010(19.06)

How to get Multi-di@g J2534 Pass-Thru OBD2 Device activation code
If you bought multi-di@g access j2534 interface from China, like http://www.obd365.com/, when you setup the software, it asks you to activate the software, then one note you need to remember is that you should set the VCI serial number as “A070026”, please check the steps as follows:

1. During installation, when Multi-Di@g configuration window appears, you should set Communication interface to USB and set VCI serial number to A070026.

2. 4 days remaining, press the green button.

3. You will see a new window show a code begins with the ID19-…. Please contact us with the code (ID19-...), then we will send you back a password, and you enter it under the “password” form as follow:

4. During the diagnostic with the device connected, warning about 0 days left will appear. Just checkthe mark “Do not display this message again” and continue the work, everything will be ok.

Visit obd365.com technical service website http://www.obd365.com/service/ and get more detail information about the software activation of multi diag access j2534.

http://www.findobd2.com

Thursday 18 September 2014

2014 Foxwell NT630 ABS Airbag Reset Tool

Foxwell NT630 Features and Benefits:
Foxwell NT630
- Coverage includes 48 manufacturers
- Works on the latest 2012/2013 models
- Compatible with both OBDI and OBDII cars, SUVs, minivans, light-duty trucks sold worldwide
- Reads and clear codes and turns off ABS/Airbag warning indicator
- Requests and records live sensor data
- Provides live data graphing
- Merges graphs for easy and intuitive diagnosis
- Performs bi-directional control tests, such as ABS motor test,   actuator test and so much more
- Retrieves ECU information
- Supports all 10 OBDII test modes, such as live data, O2 sensor test, component test and more
- Enhanced OBDII Mode 6 functionality
- Code troubleshooters provide you faster and easier diagnosis
- Multilingual menu options and code definitions
- SD memory card for data backup and software update
- As easy as 1-2-3 with large TFT color screen and menu-driven   operations
- Ergonomic design and ruggedly built for both shop and road tests
NT630 Vehicle Coverage:
America: Chrysler, Ford, GM
Asia: Acura, Au Ford, Daewoo, Honda, Holden, Hyundai, Infiniti, Isuzu, Kia, Lexus, Mazda, Mitsubishi, Nissan, Scion, Subaru, Suzuki,Toyota
Europe:    Abarth, Alfa-Romeo, Audi,Bentley, BMW, Bugatti, Citroen,Dacia, EU Ford, Fiat, Jaguar, Lancia, Land Rover, Maybach, Mercedes Benz, Mini, Opel, Peugeot, Porsche, Renault, Saab, Seat, Skoda
OBDii365
http://jtac.snappages.com/

Tuesday 9 September 2014

Solve IKEYCUTTER CONDOR XC-007 Master password

IKEYCUTTER CONDOR XC-007 Master is the most powerful universal key cutter up to now. Supporting cut and programming keys for most brands in the market. Software is updated online.

When i check history, it ask the password for me. What password should i input? Any number i like, or a fixed password? Or i can setup the password by myself? Do you need my serial number to check the password? My serial number is KM0143****
IKEYCUTTER CONDOR XC-007 Master password
Answer: This password is 123456
More OBD2 Diagnostic tool at OBDexpress, Welcom here.

Monday 1 September 2014

Vgate Scantool Maxiscan VS890 Introduction

Vgate Scantool Maxiscan VS890 is multi-language user interface, it supports up to 13 languages.Application layer fully complies with ISO 15031 and is compliant with SAE J1979.Supports a large number of vehicles made by 70 manufacturers.
Vgate Scantool Maxiscan VS890
VS890 Highlights:

Multi-language user interface, supports up to 13 languages

Application layer fully complies with ISO 15031 and is compliant with SAE J1979.
Fully functional Mode$01~Mode$09 operation.

Supports a large number of vehicles made by 70 manufacturers.

DTC includes  generic (P0, P2, P3, B0, U0 and C0) & manufacturer specific (P1, P3, B1,B2 ,U1 and C1,C2,) codes.

Detailed DTC library: DTCs are explained in easy to understand words rather than obscure jargons. Online help information is available for 80% of all the DTCs, which shows the probable  cause of the code.

It is only need $39.99 to get a Vgate Scantool Maxiscan vs890. More good quality and cheap obd2 scanner view here.

Video: Vgate Scantool Maxiscan VS890 use method

Wednesday 27 August 2014

Notes for K-TAG(KTAG) ECU programmer

K-TAG is an ECU programmer which has released to the version V2.06. It specializes in BDM function. What should be noted when using the K-tag programmer? Following notes are helpful for owners.
K-TAG ECU Programming Tool
NOTE1
Apart from some common protocols, KTAG ECU programmer also supports BDM MOTOROLA MPC5xx protocol.

NOTE2
K-TAG and KESS V2 share the same software but they are two different product. KESS V2 is able to do OBD function while KTAG can not.

NOTE3
If you find out that K-tag can only read from the slave files but not write. Make sure refer to the ECU programming list instruction. Some ECU can be read but not write, like EDC16 Audi.  Others can only be written but not read vice versa.

NOTE4
Tokens are needed when KTAG does ECU programming function. K-TAG programmer comes with 500 tokens. You can buy J-link ARM CPU repair chip to reprogram to get another 500 tokens after use them up.

NOTE5
KTAG comes with AC adapter in the package. You do not need to buy them separately.

NOTE6
Never update K-TAG programmer, otherwise will damage the tool.

NOTE7
Incorrect installation will lead to the error: "Communication error: please check power and connections" (as the picture below), here is the tutorial guide for installation K-TAG software.

kess v2 communication error please check power and connections
http://www.dailymotion.com/video/xum8h5_how-to-use-ktag-k-tag-ecu-programming-tool_auto

Thursday 14 August 2014

Benz NEC PRO57 Renew and Write ESL W204 Function


NEC PRO57
http://www.obdexpress.co.uk/wholesale/original-merc-edes-be-nz-nec-pro57.html
Top 6 Reasons to Get NEC PRO57:

1. Original device with guarantee. We get the device from NECPRO57 China's agent directly, 100% original goods.

2. The best NEC Programmer on the world, support EIS programming, ESL programming, Erase EIS, Erase ELV and so on.

3. Latest software version: V1.15, software support online update.

4. Full technical support with operation user's guide video.

5. Support All Key Lost, support Keyless GO.

6. Support 912/908 CPU infrared directly read out pin code

NEC PROG57 Language: English

NEC PRO57 Function List:

1. EIS Programming
2. ESL Programming
3. ESL W204-W212 Renew
4. Renew EIS incl. NEC IC
5. Read data incl. CAN Adapter
6. VIN Write New
7. Read and Write BE Key
8. Keyless go Key Programming

NEC PRO57 Supported Car List:

A-class W169 ( 2004-2010)
B-class W245 ( 2005-2010)
C-class W203 (2003-2007)
CLK-class W208 (2001-2002)
CLK-class W209 (2003-2008)
C-class W204 (2007-2009) with NEC in EIS
E-class W210 (2001-2002)
E-class W211 (2002-2007)
E-class W212 (2009-2010)
CLS-class W219 (2004-2009)
S-class W220 (2001-2005)
S-class W221 (2005-2009) with NEC in EIS
CL-class W215 (2001-2006)
CL-class W216 (2005-2009)
SL-class R230 (2001-2009)
SLK-class R171 (2004-2009)
G-class W463 (2002-2009)
R-class W251 (2005-2009)
M-class W164 (2005-2009) with NEC in EIS
GL-class X164 (2006-2009) with NEC in EIS
Vito/Viano W639 (2004-2009)
Sprinter W906 (2005-2009)

Thursday 31 July 2014

How to install Mazda VCM II V90 software


Video: How to install Mazda VCM II V90 software

V90 IDS Mazda VCM II
http://www.obd365.com/wholesale/mazda-vcm-ii-mazda-diagnostic-system.html

Insert Mazda IDS CD into your computer
Open my computer.
Double click "Mazda IDS 90"

Open “Mazda ids 90.exe”
Select language, and then click “Next”.
The software will be installed automatically. Then you will get a message asking you to reset your computer before continuing. Click “Yes”.
Click “Next”.
Select “I accept the terms of the license agreement”, and then click “Next”.
Select drive “C” and click “Next”.
Click “Install”.
The system will finish the installation and data upgrade for you. After the installation is complete, click “Reboot” to restart your computer.

Insert Ford IDS V81 CD into your computer.
Open the CD.
Open “ROU DVD.exe”.
Click “Calibration”. We only show you how to install calibration file in this video.
Click “Next.”
Select drive “C” and click “Next”.
Select “Install” and wait for the software to be installed successfully. Calibration file is the data you need for programming. The file can be downloaded from its official website.
Click “Finish” when the installation is complete.
Close the software.

Connect the tool to your computer. Check if its network adapter “ETAS VCI USB RNDIS DEVICE” is well installed in device manager.

Double click “Mazda IDS” icon to run the software.

Since the software I installed before is V89, the software will prompt software update. Select Tick icon to update VCM II software. Then you will get a window show you how to update.

Step 1. Disconnect VCM II from your computer.
Step 2. Remove the leather cover and find a button here. Long press the button, connect the tool to your computer, wait until all the lights blink, and then let go of the button. The computer is now establishing USB connection with VCM II.

If you cannot update the software automatically, please close the software and reopen it. A window like this will pop out. It means the system is installing software update on VCM II. The update will take about half an hour.

After the update, you can use the tool to diagnose vehicles directly. Usually, if the tool can communicate with the vehicle, there will be a Mazda VCM II icon at the bottom right corner of the window. If the icon does not exit, there may be bad connection between the tool and the car.

http://www.obdexpress.co.uk/

Tacho Pro U2008 user guide video demo part one


Video: http://youtu.be/qblEIreyYi4

Tacho Pro U2008
http://www.obd365.com/wholesale/tacho-pro-u2008-july-plus-universal-dash-programmer-unlock-1632.html
Top 7 Reasons to Get Tacho Pro U2008:

1. Support multi-languages: English/ Polish /Tagalog /Spanish/ Italian/ French /Germany

2. The current odometer reading is decoded and shown in the LCD display

3. With a clear menu guidance,it is easy to operate.Backlit display makes working possible in overcast conditions

4. All datasets can be edited, saved and loaded

5. The stored data can be transferred to a PC for archiving

6. The Tacho Universal can store up to 200 files

7. Broken speedometers can be repaired comfortably

Thursday 17 July 2014

Autel Maxidas DS708 Review

Are you Autel authorized dealer?
Yes, we are Autel authorized dealer; please check the Autel Certificate on our DS708 description page.

I tried to register DS708, but not successfully, I got error message “found no service or DNS error”, the WIFI indicator light keep flashing.
There are mainly two ways to register.

The first way: use computer to register on www.maxidas.com, (NOTE: Please use the System/Help > about function to find out the Product Serial No. and Register Password. )
https://eobd21.files.wordpress.com/2014/07/register-autel-maxidas-ds708.jpg
The second way: register on the scan tool. Before register on the scan tool, use the internet cable to connect Maxidas DS708 and the computer.

The first time you start the scan tool, it will pop up a message box to advise user to register your tool, showing as follow. This message will display 30 seconds each time you power the tool up until properly registered.
https://eobd21.files.wordpress.com/2014/07/register-autel-maxidas-ds708-2.jpg

Tuesday 1 July 2014

AUTEL MaxiSYS Pro Wireless Printing


Top 3 Reasons to Get MaxiSYS Pro MS908p:

1. Support Online Update

2. Support Multi Languages: English/ Spanish/ French/ German/ Japanese/ Portuguese

3. Support online programming , at the same time it's
compatiable for diagnosis and online programming for part of the
original software.

Monday 30 June 2014

How to Diagnose Car Trouble With an Analyzer

An automotive obd scanner diagnostic analyzer, also known as a car diagnostic computer, can easily plug into an automobile's computer system in order to read the codes installed for each car's on-board computer. However, not every car diagnostic computer is the same. Check the model that you have purchased -- or are considering purchasing -- is compatible with your vehicle. Car diagnostic computers are useful to have in your toolbox since a lower-end model can cost less than $100, which is comparable cost-wise to having your car scanned at a service center.

1. Open the driver's side door of your car. Since 1996, vehicles produced for the American market have utilized a standardized On-Board Diagnostics (OBD) system. This means that every car manufactured since 1996 is readable by most diagnostic analyzers used by professional mechanics as well as those available to consumers. The D-style, plug-in connector for a diagnostic analyzer is usually located underneath the driver's console in or around the fuse box. Refer to the owner's manual for your vehicle to help locate the plug-in connector for the scanner.

2. Turn on the diagnostic car scanner and plug it into the D-style plug-in connector. Follow the prompts on the scanner and press the "Check" button. Different scanners will operate with slight variations. Turn the key in the ignition to the "Accessories" position. Wait two to five minutes for the scanner to read the code(s) displayed by the car. Some lower-end scanners may require you to connect the scanner to a computer via a USB port. According to CarsDirect.com, a Palm Pilot will often work to help read the code from the scanner.

3. Look up the diagnostic trouble code on the Internet if your code reader does not have the ability to display the problem. Some scanners that are more expensive will be able to tell you what the problem is as well as the code that goes along with the problem. gm tech 2

4. Clear the code from your car after making the necessary repair. If the codes or a "Check Engine Light" reappears after driving the vehicle a few miles, the problem has not been resolved and will need to be looked at again.


Thursday 26 June 2014

How to update maxidas DS708

First, should be have original Autel Maxidas DS708 Automotive Diagnostic System, PLS buy original DS708 Automotive Diagnostic System

When you connect DS708 with your car(power) at first time,

There will be an menu interface, and tell you the serial number and password about

Your DS708(just unique), pls save them!!! it is the key when updating!

then use the serial number and password, register a user name:
http://www.maxidas.com/member/service.aspx

after finished, you can download the latest versoin DS708 file,and uninstall the old version

install latest version to CF cards.

Thursday 19 June 2014

How to solve Honda CR-V and ABS communication failure

Honda CR-V 2 2007. 4L car with mileage about 97,000 km, whose ABS indicator light flashes intermittently. But after carried ABS road test, it is found that the ABS system is working properly.

Diagnosis:
1) Apply Honda HDS HIM to read the fault code, indicating DTC BL170--communication fault between instrument control module and ABS modulator control unit.
(NOTE: HDS is a powerful and affordable Honda diagnostic tool It is available for reading and decoding fault codes from control blocks memory.  For more information, click here: http://www.obd365.com/wholesale/honda-hds-him-diagnostic-tool-with-double-board.html)


2) Disconnect the pin B (36 cores) of instrument control module connector and the 26-pin of ABS modulator control unit.

3) Use a multimeter (such as: MST-2800B Intelligent Automotive Digital Multimeter)  to check terminal communication lines of 26-pin ABS modulator control unit and B-pin (36 cores) instrument control module connector. The result was that communication control lines were functioning.

4) As the figure shows, use a multimeter to check communication lines connecting 26-pin terminal of ABS modulator control unit and B-pin (36 cores) terminal of instrument control module connector, indicating that the communication control circuit is working. So it can be inferred that ABS modulator control unit has no problem.

5) According to the phenomenon, it can be determined as intermittent defect, which is usually caused by poor contact of bonding or plugs. Looking over the circuit diagram, the main bonding is G401, which tends to be normal. But the direct relevence with bonding is liquid level switch.

6) Finding that the braking fluid level is too low to turn off the liquid level switch, leading to disconnect the G401. As a result, ABS indicator light flashes intermittently.

7)After testing the liquid level switch, it works abnormally. Then change the liquid level switch and add braking fluid, the fault is completely cleared.
http://www.obd365.com

Thursday 12 June 2014

How to solve Toyota P0031 & Check Engine Light on

The Toyota Camry came back again for reparation, which had been repaired for several times because the CEL was on. Strangely enough, the car works well without other abnormalities.
Facing this thorny issue, this time I tended to apply V2014.6 Toyota Intelligent Tester 2 IT2 with Suzuki, the SUZUK company professional diagnostic tool for the Suzuki car. I first connected IT2 into the Powertrain / Engine and ECT / DTC, reading the error code P0031 (HO2S heater control circuit low), while the DTC's frame data found no error. According to the maintenance manual, the causes of P0031 are: A / F sensor heater circuit broken; A / F sensor heater (sensor1) fault; engine J/ B (EFI relay) fault; ECM failure, etc.
toyota intelligent tester 2
1) I disconnected C15A / F sensor connector to measure resistance of C15-1 and C15-2 terminal ( A / F sensor heater + B and HT terminals), reaches 2.6Ω, within the normal range (1.8 ~ 3.4Ω); moreover, resistance between C15-1 (HT) and C15-4 (AF-) terminals is infinite, normal. So A / F sensor failure can be excluded.
2) Then I turned on the ignition and measured voltage between the C15-2 (+ B) terminal and the bonding, which is 12.7V, normal. This will initially rule out the A / F sensor circuit fault.
3) According to the system circuit diagram, the resistance between C15-1 (HT) terminal and ECM C24-109 (HAlA) is 0.24Ω, and between C15-1 and the bonding is infinite, indicating that A / F sensor heater with ECM lines is normal. Considering that the fault occurred intermittently, I cleared the code and tested, however, CEL lighted again when the vehicle was driven on a relatively bumpy road.
4) Back to the shop, I found the code was still P0031 re-read by car diagnostic tool IT2. Then I entered Utility (Tools) / CheckMode, which will transfer ECM from normal mode to check mode, afterwards, shaking relevant components. When shaking J / B, CEL light up again. It turned up in several tests, so it can be determined as the J / B-related failures.
Finally, I removed J / B and pulled 1E, the plug was found in corrosion. Combined circuit diagram, 1E-7 is the very power line of A / F sensor heater. I dealt with the corrosion, the fault was completely cleared after repeated test.
http://www.obd365.com/wholesale/digimaster-3-digimaster-iii-original-odometer-correction-master-with-980-tokens-2253.html

Wednesday 28 May 2014

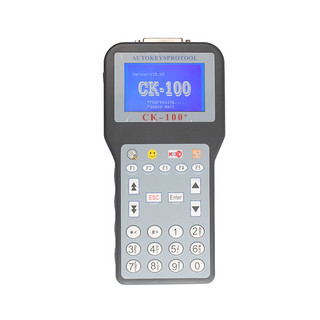
CK-100 Auto Key Programmer Reviews

My friend has a SBB key programmer; he says it has an upgrading one: CK-100, CK-100 V99.99 is better than SBB key programmer. Then I got one from obd365 about 150 dollars, not expensive. CK-100 supports English, Italian, Dutch, French, Spanish, Portuguese, and Turkish. It has more languages, so it's easier for different users from worldwide.

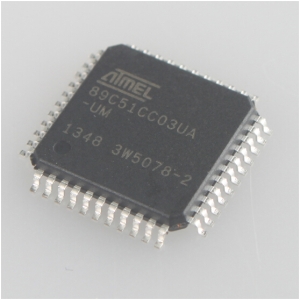
He used it to program keys for his Audi and I programmed 2 cars (Acura and Chrysler). It worked well. CK-100 needs tokens and it has only 1024 tokens. I cannot add tokens online, but buy an AT89C51CC03U NXP Fix Chip and directly replace the old board with the new one, then CLK100 will have more 1024 tokens.
NXP fix Chip for Ck-100 V99.99
I wanted to use this tool to program Toyota chip G. But I was suggested to use FVDI and after tested it can work. The shortage of CK-100 is that it cannot update online which is a little bit trouble, but it is cheap, so it deserves its value.

Thursday 22 May 2014

How to Reprogram a Car Key


Introduced in the 1990s, electronic keys can be programmed to your car's engine to offer extra convenience and security for your vehicle. These keys, also known as chip keys or transponder keys with CK-100 V99.99, are synced to your starter. Once they are programmed, they are the only keys that can start your car's ignition. You can reprogram lost signals from your driver's seat, in just minutes, as long as you have two programmed keys.

Enter your car with your two programmed keys and your new, unprogrammed key.

Insert the first programmed key into the ignition. Turn it to the "On" position, and then back to the "Off" position.

Remove the first key and insert the second key within five seconds.

Turn the second key "On" and then back "Off." Remove the key.

Insert the new key with VPC-100 within 10 seconds and turn it to the "On" position for one second. Return it to the "Off" position.

Wait for the security light to turn on and stay on for three seconds before removing the new key. The reprogramming is now finished.

Friday 9 May 2014

Review on SVDI VAG Commander

Early this year OBD365 sent me an email about their new arrivals, among which I saw SVDI VAG. I had heard about this tool recently. Since their price was reasonable, I finally decided to give a shot. I ordered one from its official website SVDI VAG Commander 19+BMW Commander+Immoplus+Tag Key Tool for US$599.99. By far I have had the tool for nearly a month. Here I would like to share my reviews.

First things first, I can tell you that the tool really works. I have reset an Audi A6 service light and clear a 08 VW PASSAT 2.0airbag crash data with the tool. I also have successfully used it to program ECUs for a VW and a Skoda.

Besides, different from other VW diagnostic tools I have used before, SVDI is compatiable with both gasoline and diesel cars and trucks. That is just what I need.

About its quality and abaility, I have exchanged views with some mechanic friends who purchases SVDI from real stores. It is a lot cheaper than those SVDI commanders sold in auto repair shops, but according to my friends, it works as good as those ones.

Friday 25 April 2014

How to Get Pincode of 7 Car Brands

When program keys for some cars, it is necessary to put in pincode for the car key programmer without reading pincode function. Here shows you 7 car brands getting pincode methods.

1. VW
1) VW models from 1994 to 1997, chip keys are composed by copied chips. 4 digit numbers is provided by the manufacturer to the user together with the original keys in hand.

2) Volkswagen from 1997 to 2000 have the chips cannot be copied. 4 digit numbers is provided by the manufacturer to the user together with the original keys in hand.

3) 2000 - 2001 Volkswagenon their own 4-digit password retention, available to customers only if the customer requests a password.

4) Since 2002, the factory of VW is only available to customers with a 7 -digit code, changing every day, vehicle anti-theft computer recognize only a 4-digit password; thus SILCA Software Company has developed a 7-digit code can be converted to 4 digit password.

5) The use of special equipment can read out pincode, such pincode reader or calculator

2. Opel

Car manufacturer provides owners three groups of password: car audio password, the key tooth code and pincode.

If the car owner lost the security password, he/she could use the ID number to ask from the manufacturer. Besides, read out by using special anti-theft device password.

3. Citroen

Manufacturer gives the owner a small card with a 4-digit password on it. if owners get lost password, they could get from manufacturers by providing the ID number for PINCODE: XRR7RENAULT. In front of the door using the manual password is IMMOBILIZER password. What is more, use special equipment to find security code

4. Nissan

Nissan made before 2003, the password is: 5523; while cars after 2003 should be calculated by special calculators, and converse serial number.

5. Honda
All Honda does not require a password.

6. Toyota
All Toyota does not require a password.

7. Hyundai
The first generation IMMO password has three types: the rest 4 serial numbers, 0000 or 2345.

The second generation IMMO is a group of six-digit password, inquiry dealer.

The third -generation anti-theft system (green primary key) can be matched directly with the decoder.http://www.obdii365.com

Thursday 17 April 2014

A not bad experience with troubleshooting MINI DSG problem

A not bad experience with troubleshooting MINI DSG problem
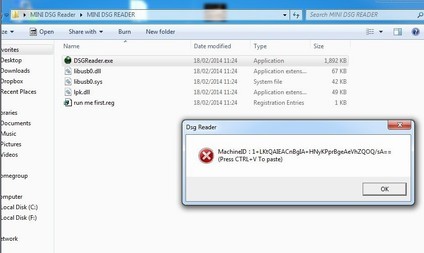
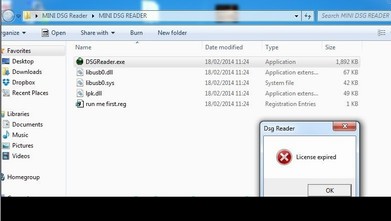
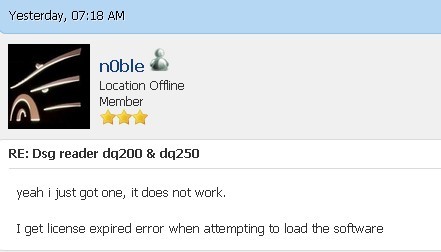
I was confused with why my MINI DSG informed me license expired error when I installed its software, error/information pictures show as follow:
mini dsg software error
I got troubleshoot method from the combination of net friends and my seller customer service from obd365.com:
Solutions:
Step1: send my mini dsg hardware id/sn to my seller for calculating the software license
Step2: copy the software license to the dsg folder and try to run software with the hardware plugged in
Step3: it has already done.
According to my purchasing experience, I got that if you do not know much about one product/thing, you could have a search online to find useful information for internet now is very easy to access to. And other side is that better make good use of customer service, for customer service and product quality is the most important part to a company.
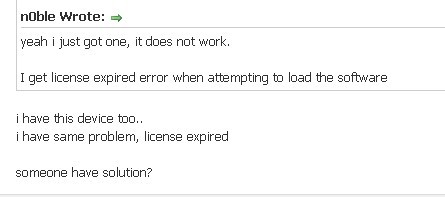
When I got license expired problem on MINI DSG, I made good use of two. First of all, I search online and find a forum post about it, show as picture below:
search internet
search internet
As I read them, I got to know that it is common problem among users. Therefore I turned to my customer service in obd365.com, and had my problem solved.
That is all my experience about troubleshooting DSG license expired, and to some extent, it is a not bad experience for I knew better on making good use of internet resource and customer service help.

Wednesday 9 April 2014

Diagnose Honda CRV With No Spark

The Honda CRV uses a distributor cap and rotor assembly to supply power to the spark plugs to ignite fuel. An engine NEXIQ 125032 needs three things to run: fuel, spark, and compression. For fuel, this means a proper air-to-fuel mixture. For the CRV, this is 14.7 parts air to 1 part gasoline. Compression refers to the compression inside the engine cylinders. If there is a leak in the engine block where air can escape, then there will be a loss of compression. Spark refers to the electrical spark generated by the distributor system. When you aren't getting spark on your CRV, you'll need to troubleshoot the problem.
Remove the spark plug wires by pulling them up out of the top of the engine. You may need to wiggle them from side to side a bit, but they should pull straight up out of the top of the engine.
Remove the spark plugs. Attach the spark plug socket to the extension and lower it into each spark plug well. Grab the top of the spark plug and turn the socket and plug counterclockwise with a socket wrench.

Pull each spark plug out of its spark plug well along with the spark plug socket.
Pull the spark plug out of the spark plug socket and insert the plug into the open end of the spark plug wire with the electrode on the spark plug facing out. Do this for all of the spark plugs. Insert each plug into its respective plug wire with the electrode facing outward.

Crank the engine the key pro m8 and have an assistant check for a solid blue arc between the electrodes on the spark plugs. If there is a solid blue arc on every plug, then you have no spark issues. If there is no spark, then remove the spark plugs from the spark plug wires.

Insert a long screwdriver into the open end of the spark plug. Lay the screwdriver down next to a metal screw on the engine. Crank the engine again and have an assistant check for spark. If there is a spark, the spark plugs are bad. If there is no spark, then pull the spark plug wires off the end of the distributor. They should pull right off the distributor.

Place the metal part of the screwdriver next to the electrodes on the distributor. Crank the engine again. If there is no spark, then the problem is with the distributor. If there is spark, but there was no spark during the plug wire check, then the problem may be the spark plug wires. The spark plugs themselves---unless there is corrosion or visible damage to the electrodes, or the plugs have over 30,000 miles---are likely not the issue.

Thursday 27 March 2014

The theft technique on automobiles


An anti-theft procedure obd2 scanner is a fantastic alternative that comes stock or common on some newer models of automobiles. The technique prevents your automobile from remaining stolen and will, in some instances, lock the engine when it senses a threat. That causes a critical challenge at times due to the fact it can lock itself for no explanation which means which you can not start out your automobile. If this takes place, you will need to turn off the anti-theft program by tricking the car or truck into thinking the threat has passed.

Look in your dashboard to get a light that signifies an anti-theft system. On most motor vehicles it really should say theft method underneath a small light. This displays which you do have an anti-theft process in your auto and that it is now functioning.

Check the wiring beneath the vehicle for making certain the wires are intact and that they aren't missing or loose. You are able to find out what wires visit your anti-theft technique by taking a look at the owner's manual that came along with your vehicle, or by borrowing a guide from your library.

Examine Tuirel S777 your battery to produce certain it's operating. If your battery is dead, your car will create a soft whirling sound or even the engine will only click after you try to flip it over. Possess the auto leap started out if the battery is dead.

Put your vital within the ignition and twist your hand forward. You would like the interior lights and radio to come on, but not the engine itself. In some instances chances are you'll must turn the key backwards to do this, but it will depend on the make and model in the vehicle.

Wait no less than ten minutes in advance of you clear away the important thing. This does location some stress on the battery so that you must ensure that the battery is functioning in advance of you do that. Right after 10 or 15 minutes, the anti-theft technique on your vehicle will shut itself off and you'll see the light on your dashboard turn off. The moment this occurs, you are able to easily get started your car or truck.

Tips & Warnings ATMEGA64 Repair Chip
You can take your auto to the repair shop or dealership if you'll want to but, in most situations, they'll take the same steps as described here to fix the car or truck.

Wait until the light in your dashboard turns off before you attempt to start off the car or truck. By trying to accomplish it ahead of the light turns off you can drain your battery.

Thursday 20 March 2014

My New Alternator Won't Charge


You went out for your car obd2 scanner and the battery is dead, once more. You simply put in a whole new alternator on your engine, so what may be wrong? The alternator is an important piece of gear with your motor vehicle. It acts like a charger, recharging your battery because the electrical system makes use of the energy stored inside the your battery. If a whole new alternator is still supplying you with trouble, it really is time for you to go back to your basics and verify the alternator was the initial difficulty.
Inspect the alternator mounting bolts. The bolts really should be tight and the alternator should really be fastened securely to your engine. The belt driving the pulley really should be tight. Press the alternator belt together with your thumb. The belt ought to give approximately 1/2 inch. In case the belt moves greater than a 1/2 inch, reposition the alternator and tighten the belt. Start out the engine, the alternator and belt ought to turn in unison.
Inspect the battery and alternator connections. All connection should be tight and cost-free of corrosion. Clean corrosion with baking soda and a small wire brush. Inspect the chassis ground connection. The chassis frame connection ought to be tight and totally free of rust, paint, oil, dirt and debris. Clean rust and paint from your frame which has a scouring pad. Get rid of all oil, filth and debris.
Inspect the engine CK-100 harness. All electrical connections must be tight and free of charge of corrosion, abrasion, oil, grime and debris. Reconnect all loose connections. Temporarily restore exposed wires by wrapping black electrical tape around the exposed wires. Get rid of corrosion with baking soda along with a wire brush.
Turn the key switch to "OFF" and measure the voltage across the battery terminals. In case the engine has become sitting overnight, the voltage really should be approximately 12.6 volts. In the event the engine has not long ago been run, the voltage might be greater than twelve.six volts. When the voltage is lower than 10 volts, spot the battery on the charger.
Inspect the fuses while in the fuse box. Refer for your owners guide and verify that the fuses linked to the alternator and charging circuit are usually not blown. Substitute any fuses that happen to be blown or damaged.
Turn the key Multi-diag Access J2534 switch switch to "START" and start the engine. Measure the voltage across the battery terminals. With the engine working at lower idle, the voltage really should be about 14.6 volts. Should the voltage is lower than twelve.five volts, substitute the alternator. In the event the voltage is more than 15 volts, the alternator is overcharging that battery. Replace the alternator.

Tuesday 18 March 2014

Indications of the Undesirable Idle Air Manage Valve


An idle obd2 diagnostic air handle valve, also referred to as an IAC valve, is present in each and every car and it is positioned within from the throttle entire body. When a auto idles at a red light or though parked, the idle air control valve regulates the amount of air that circulates in the engine, which keeps the engine at a steady RPM and prevents rough idling. When an air handle valve goes lousy as a result of both carbon buildup or finding stuck, you'll find a handful of apparent signs.
Low RPMs
A undesirable idle air control valve will protect against satisfactory air movement to your engine and will end result in increasingly lower RPMs when idling. The number of RPMs, when idling, will vary a bit dependant on the person car but is generally thought of very low when beneath 800 RPM. The RPMs will increase to typical ranges once the accelerator is pressed.
Stalling Multi-diag Access J2534
As the air control valve gets to be increasingly clogged, the engine RPMs, even though idling, will continue to drop until eventually the car stalls. This issue can typically be recognized by applying the gasoline. When the vehicle is about to stall, pressing the accelerator will result in the RPMs to boost and can retain the motor vehicle operating. When the pedal is released, the RPMs will swiftly drop, as well as motor vehicle will stall. Often, according to how badly the idle air control valve is clogged, the car may well run accurately when the accelerator is pressed, but then sputter or stall when decelerating.
Rough Idle
If the idle air management valve has gone bad and no longer regulates the movement of air in to the engine, generally due to the IAC being caught open, the motor vehicle will idle roughly. A rough idle is characterized by shaking, vibrating and shuddering though the car or truck is on but not moving. A rough idle resulting from a negative consumption air control valve will inevitably consequence in stalling immediately right after commencing the vehicle.
Weather Variations
A poor idle NEXIQ 125032 air control valve can cause an automobile to stall right away after ignition in warm climate, but the automobile will commence thoroughly when it is cold. When the accelerator is pressed, even so, the vehicle will stall. Likewise, when the temperature outdoors is warm sufficient, the automobile may well start while the idle air control valve is terrible but will call for the driver to immediately press the acceleration pedal to maintain it from stalling.

Thursday 13 March 2014

Ford Speedometer Troubles


The speedometer digiprog 3 is a vital a part of the car engine because it signifies the pace of one's automobile although to the road. A faulty speedometer can cause important driving challenges, which may result in speed-related accidents or an pointless speeding ticket from the police. As with any brand of vehicle, Ford cars are vulnerable to speedometer complications.


Makeup
Most Ford automobiles are equipped which has a Programmable Speedometer/Odometer Module (PSOM). The PSOM contains the odometer as well as the speedometer, which are electronically managed by a programmable microprocessor. The module performs by receiving pace signals in the Differential Speed Sensor (DSS) and converts the signal input for the regular eight,000 pulses per mile output.
Problems
The most common digimaster 3 difficulties together with the Ford speedometer are when it bounces back and forth constantly although the motor vehicle is remaining driven. Another issue that may arise is once the speedometer does not move whatsoever. This signifies the car's speedometer is dead.

Causees
Speedometer concerns typically come about when main adjustments are created on the Ford vehicle. These consist of modifying fuel sorts (from diesel to unleaded gasoline for example), and transforming tires, as the vehicle's speed functionality varies depending on these two facets. It's not unusual then to suit your needs to encounter a faulty speedometer following acquiring had your tires transformed, for instance. The conversion frequent essential to calculate your instantaneous velocity is distinctive and has however to become established.
Troubleshooting
If you believe that you are getting problems together with your Ford speedometer because of tire or fuel adjustments, the the best technique to solve it is actually by resetting the PSOM. You may do that by pressing the Choose button located within the upper right corner of the speedometer, then you certainly select zero for the journey odometer. Up coming, you press the RESET button (ordinarily within the upper left side of the speedometer), and the moment the journey odometer is displayed, you then press the Pick button once again to view the odometer worth. Additionally it is a will have to to change the speedometer's inner conversion frequent should you have changed tire sizes since this can enable your speedometer to calculate your velocity accurately.
Repair obd2 diagnostic
Because the Ford speedometer is outfitted inside a full-device module, the sole technique to resolve a broken speedometer is by total substitute. The PSOM units is usually pretty high priced as a consequence of their computer parts. Hence, it's important examine out your speedometer's performance (in addition to the odometer calculations) and provide the ideal conversion constants to ensure that they will not only be capable of give proper calculations, but in addition keep away from incompatibility complications with any new modifications produced to the vehicle.

Tuesday 11 March 2014

The best way to Take out an Engine Noise

Staying SKP900 on prime of one's very own motor vehicle servicing can conserve you time and money, as long as you happen to be competent in what you are doing. The initial phase in problem-solving a vehicle noise should be to accurately diagnose the source of the noise then make the restore the right way. If at any stage you are in more than your head by using a do-it-yourself upkeep or repair career, take your vehicle to a licensed auto-mechanic.
Check the tension in your drive belts if you hear steady squealing coming from your engine. You should be able to depress your drive belt by pushing down within the center of the belt. Should the distance in between two pulleys is 7 to eleven inches, then the belt really should deflect 1/4 inch. In case the distance involving pulleys is twelve to sixteen inch, the belt need to deflect 1/2 to 1/4 inches. If there is extra deflection than important, tighten the belt by torquing the tensioner adjuster clockwise until eventually the proper deflection sum is reached.
Listen to get a clicking or tapping noise that grows louder as the gas is fed to the engine as well as engine is reved. Turn off the vehicle and verify the oil level, which may well be reduced. Open the hood and pull out the oil dipstick. Wipe the dipstick clean by using a cloth and reinsert it into the dipstick housing. Pull the dipstick back out and inspect the oil level by noting the maximum and minimal markings within the dipstick. Include far more oil or switch to a lower-viscosity grade of engine oil should you be employing a thicker type of oil. In the event you proceed to possess difficulties, you could have a leak inside your oil lines, negative gaskets or even a broken oil pump.
Listen NEXIQ 125032 for pings or knocks that arise especially when accelerating, which may possibly indicate a failed EGR valve. Substitute the EGR valve. Should you carry on to have a check-engine light come on so you nonetheless hear the pinging, your engine might have additional carbon buildup during the combustion chambers or improper ignition timing. These fixes will more than likely have to be accomplished by a trained mechanic. Switch to a greater octane fuel grade ahead of taking your car to a mechanic to view if that fixes the situation.
Listen for grinding or grating that occurs whenever you start your car. Locate the starter by tracing the favourable battery cable to a portion that has two cylindrical units joined collectively and it is about the shape of the modest football. Clear away the starter and also have it inspected by an auto-parts keep, which can test it for free. Probabilities are that the starter's geared teeth are broken and want changing. If your starter continues to grind away in the flywheel, the flywheel may possibly will need transforming also, which can be much a lot more challenging and pricey to exchange.

Friday 7 March 2014

Signs That Your Wheel Bearings Require Changing


Wheel bearings obd2 scanner are highly engineered little units that carry out an exceptionally very simple undertaking underneath some quite demanding situations. The wheel bearing's primary perform should be to facilitate wheel rotation, something that even a stick plus a donut could manage, but it need to do so though coping with 1000's of lbs in sideways force and a great number of impacts and vibrations. Bearing failure is, sadly, inevitable, but identifying the signs and symptoms early can save your bucks or your existence later on.
Wear Progression
Slight wheel bearing dress in will commence like a whine or hum, specifically though turning the steering wheel tough adequate to result in the automobile to lean. This humming will at some point come to be virtually consistent, progressing to a rumble though turning. Once the rumbling becomes continual, it'll progress to a deep growl and obvious vibration though turning the wheel or hitting the brakes. The growl and the vibration will sooner or later develop into permanent, rising louder and much more severe till you can't disregard it and one thing significant falls off the auto.
Mechanical Damage
Allowing GM Tech2 typical dress in to progress will at some point lead to some type of extreme mechanical injury, but so can sudden impacts like velocity bumps, parking specifications and large potholes. Grinding though turning is usually a subtly but noticeably distinct factor than normal wheel bearing growl -- it sounds a thing like a cinder-block staying dragged across a large metal plate -- and signifies a dry and broken bearing. In the event you hear a snapping, popping, clicking or clunk while turning, you then may have serious bearing issues. Wheel vibration or wobble is really a sign that 1 of your front bearings is really damaged. In case your wheel starts wobbling and you proceed to drive the auto, then make sure that your will is updated.
What It Isn't
Suspension and steering methods are extremely complex, plus a number of other malfunctions can come to feel or sound like bearing failure. A consistent hum or vibration signifies bearing failure if it intensifies although turning or braking, but solely speed-dependent humming and vibration is possible a tire or a little something in the drivetrain. Keep in mind although, that when the vibration itself may possibly just be a poor tire, that tire will at some point hammer your bearings to powder and then you surely can have a bearing challenge. Wheel wobble may possibly be a undesirable tire, misaligned suspension, malfunctioning steering procedure, bent chassis or loose lug nuts. A challenging knock or clunk under acceleration or deceleration is usually a terrible CV joint, as is actually a consistent clicking whilst turning.
Finding the Negative Bearing
Bearing noise the key pro m8 is often hard to obtain; you realize it really is there, you just can't inform which wheel it truly is coming from. The answer is testing by fat transfer. The car's entire body reacts to improvements in direction by leaning away from them, transferring its bodyweight to your outside tires although turning, towards the front tires even though braking and to the rear tires even though accelerating. This elevated load is what puts strain on your bearings, making it possible for you to hear or come to feel the symptoms. So, locate a significant parking whole lot and drive close to in a circle at about 35 mph; should the bearing noise will get louder, the poor bearing is on the outdoors of your turn (suitable side if you're going counterclockwise, left side in case you are going clockwise). Up coming, accelerate tough inside a straight line to 50 mph and hit your brakes tough ample that you simply come to feel the front of the automobile begin to nose-dive. Should the bearing noise will get louder all through acceleratio,it is the rear; if it will get louder under braking, it's the front.

Monday 3 March 2014

Dodge Ram Transmission Issues

The Ram is often a complete dimension pickup truck manufactured and offered by American automaker Chrysler. The Ram produced its debut in 1981 ans was part with the Dodge division from its inception until finally 2009, when Ram became its very own special truck division. Though the Dodge Ram was acknowledged for virtually thirty many years being a trusted, capable truck, owners have seasoned some frequent complications, such as challenges with the truck's transmission.
Types of Problems
Over the course of its manufacturing, Dodge provided many various transmissions from the Ram pickup. These included both guide and automatic transmissions. Some drivers of Rams outfitted that has a manual transmission have complained of your shifter knob coming loose, a transmission that leaks fluid and gears that grind simply when shifted. Challenges with the Ram automatic transmission involve leaking fluid, unwanted shifting concerning gears and abrupt automatic shifts.
Dangers and Symptoms
There are quite a few essential strategies to recognize one of these Ram transmission challenges. Nearly all of the problems result in excessive noise throughout shifts, frequently described as a clunking sound. Other transmission complications could cause a pool of fluid to develop under the truck. Bad fuel economic system is a further symptom of transmission difficulties. Although the vast majority of these challenges pose no serious, quick danger on the driver, a severely damaged transmission may possibly lead to the Ram to stall in visitors, developing a harmful situation.
Repair Costs http://www.findobd2.com
The price of repairing a Ram transmission varies around the nature of the issue. Tightening a loose shifter or resetting an automated transmission's electronic manage unit may only require an hour's labor from an auto technician. On the flip side, a lot more significant challenges may require the set up of a completely new transmission, which can price upward of $1,000 set up. Tiny fluid leaks and faulty gears may price a number of hundred dollars.
Warranty Coverage
Every Dodge Ram was sold with Chrysler's new vehicle warranty, which incorporated powertrain coverage. This guarantee is possible to cover the vast majority of main transmission issues that a motor vehicle lower than a few years previous is probably to expertise. If an proprietor obtained a lifetime or extended guarantee, or the dealer additional one as being a promotional item, the coverage may well be all the more total. Make sure to test together with your neighborhood dealer before ordering repairs to check out no matter whether your Ram's transmission still has warranty coverage of some sort.
Recall
The Dodge Ram has become the topic of various recalls enacted by Chrysler to deal with known troubles. One particular of those recalls dealt exclusively with the automated transmission in Ram models generated in the early-2000s. The recall, issued in December of 2003, handled fasteners that affixed the transmission on the transfer case. Faulty fasteners developed the prospective of the fluid leak that can bring about a gasoline leak and present the danger of the fire.

Wednesday 26 February 2014

Homemade Wire-Wrap Stone-Cluster Pendant


Wire-wrapped jewellery obd2 scanner is usually a fashionable and informal solution to dress in gemstones. With equipment observed at many craft and jewelry supply shops, it's easy to make your personal wire-wrapped jewelry, which include a stone-cluster pendant. Cascading with stones, this necklace might be as easy or extravagant while you need.
Choosing the Stones and Wire
Choose top-drilled stones as they're simplest to work with and require considerably significantly less wire than stones drilled vertically. Search for stones inside a assortment of colors or shades, and in fascinating shapes. A cluster pendant should ideally have a number of sizes of beads. Invest in dead soft wire since it will be the easiest to operate with when wire wrapping, and generally wear eye protection when cutting wire.
Wire Wrapping Approach SKP900
Begin along with your greatest stone, which can be the focal level with the stone cluster. Minimize about 1 1/2 inches of wire for a medium-size stone. Thread about 2/3 of the wire by way of your stone and push the ends upward so they cross just above the tip of your bead. Use jewellery pliers to grasp the shorter end of the wire and wrap it numerous occasions across the longer end. Lower off any excess with wire cutting pliers and press the lower end flush against the wraps.
Form the huge hanging loop with round-nose pliers. Begin on the best with the wraps and bend the wire across the pliers to make your loop. Retain your round-nose pliers while in the loop to prevent deformation. To get a messy search, wrap the wire loosely around the former wraps and in some cases more than the stone. To get a sharper appear, keep the wraps tight; three wraps will be the minimum.
Attaching the Stones
Attach Porsche Piwis Tester II the stones with jump rings. Always open jump rings by twisting, in lieu of pulling them apart. Slip the prime loops of a single or two stones onto a leap ring and add it towards the top rated loop of your biggest stone. Shut the jump ring by twisting the ends collectively, and pinch with pliers if required to close the gap. When you have much more stones, include them to a separate leap ring (or two) and attach these leap rings to the first leap ring, building a cascading chain. Attach to a chain or cord applying a bigger jump ring or the major loop on the largest bead, if it truly is wide sufficient.
INstalling for VAS 5054A ODIS V1.two.0 with OKI Chip Assistance UDS Protocol: http://youtu.be/_PR4Pc9ZU-8

Monday 24 February 2014

Indicators the Transmission Is Going Out in My Truck


Transmission Fluid Leak obd2 scanner
The very first indicators of a transmission fluid leak is usually improper shifting or even a leak that is certainly apparent within the ground under the transmission, transmission fluid container or base tube. Check your transmission fluid level. It truly is uncommon for the degree to get under the advisable suggestions except if there exists a leak somewhere from the method as a transmission is actually a sealed program. When you check the fluid level, also notice if your color is dark brown or black as opposed to a reddish shade. This could be a sign on the fluid not circulating appropriately and truly becoming burnt, which thickens the fluid and prospects to insufficient lubrication within the method. Putting a considerable piece of cardboard underneath the car that's beneath the two the front and rear seals and the transmission fluid reservoir can isolate a leak to ensure that only the seals at any given spot may well need replacing. Leaks are prevalent with the transmission drain, the front seal involving the transmission and engine and on the selector shaft.
Rough Shifting
There may be several factors for any transmission that shifts really hard. Newer model cars with automatic transmissions have shift sensors that tie in to the computer system process and notify the transmission when it should really shift into every gear. Rough shifting could be a signal of the faulty sensor. You'll find also several oxygen sensors inside a car, which could possibly be faulty and lead to the exact same inconsistent or really hard shifting difficulties.
Shifting skp900 With the Wrong Time
A transmission that is made up of a shift sensor may possibly occasionally shift as well early or too late. If it shifts as well early, it's going to lag into the upcoming gear with out the regular pickup pace linked with shifting into that gear. When the transmission shifts also late, it is going to audibly rev the engine's RPMs just before shifting into the upcoming gear. A throttle cable that's from adjustment and may possibly only require adjusting to rectify the challenge can cause these two situations.
Excessive Noise
The most common issue connected with a transmission malfunction on a conventional transmission is extreme noise. A high-pitched squeal or grating noise can come about when the clutch is depressed. This is the sign of failure of the clutch release bearing or pilot bearing. Exactly the same forms of noises which might be heard when the engine is idling plus the clutch just isn't depressed point to failure in the clutch disc, clutch release or pilot bearing or torque tube bearings.
No Movement/No Engagement MINI DSG Reader
If the transmission with your truck will not engage in any respect, then you have no movement. A transmission could also appear caught in a single gear and never engage in to the next. It may be caught in to start with, second or third gear and never shift upward, or it could not engage in reverse gear. If you have any of those signs and symptoms, it can be most effective to possess a qualified experienced seem at it since in excess of very likely it can be an internal transmission issue.