UK SHIP, NO TAX

Wednesday 30 December 2015

VVDI MB Tool 2.0.4 Add Mercedes BGA Key Step by Step

OBD2EXPRESS technicians has successfully added BGA keys of Benz W166, 197, 212, 218, 246, with Mercedes key programmer- vvdi mb bga tool 2.0.4. Here is the instruction for you.

Tool used:

laptop

Original VVDI MB tool

vvsi-mb-tool-add-bga-key-(0)

Successfully added BGA key includes:

Mercedes Benz W166, 197, 212, 218, 246

Step-by-step procedure to add bga key:

Step 1 Read EIS data

Connect VVDI MB BGA Tool to the laptop.

Go to EIS Tools. And click Read EIS data.

vvsi-mb-tool-add-bga-key-(1)

Reading data success.

vvsi-mb-tool-add-bga-key-(2)

Step 2 Password Calculation

Go to Password Calculation.

Select the Chassis: W166, 197, 212, 218, 246 and Mode: OBD

And click Data Acquisition.

vvsi-mb-tool-add-bga-key-(3)

Do follow the prompt on the screen.

Insert the working key to EIS, and then click OK to go on.

vvsi-mb-tool-add-bga-key-(4)

Insert working key to Device IR Reader, and click OK.

Insert the working key to EIS, and then click OK.

Insert working key to Device IR Reader, and click OK.

Processing data acquisition... (5 minute needed)

Insert the working key to EIS, and then click OK.

Insert working key to Device IR Reader, and click OK.

Data reading success.

Save data.

Step 3 Upload data to send acquisition data

Acquisition finished. Click OK.

Upload the saved data with Upload Data for password.

vvsi-mb-tool-add-bga-key-(5)

Upload success. Click OK.

Step 4 Queue result to get result

Queue number 1, require 1 minute to finish. Click OK.

vvsi-mb-tool-add-bga-key-(6)

Find correct password. Click Copy.

vvsi-mb-tool-add-bga-key-(7)

Password was copied to clip board.

Step 5 Paste password and save EIS data

Go to EIS Tools.

Click Read EIS data.

Click Paste to get key password.

vvsi-mb-tool-add-bga-key-(8)

Click Save EIS data.

Click OK to save HC05 format file.

Step 6 Prepare key file

Go to Prepare Key File.

Click Load EIS file.

vvsi-mb-tool-add-bga-key-(9)

Select the file to load, and click Prepare Key File.

Prepare Key File...

Save key file.

Preparing keys...

All key files

vvsi-mb-tool-add-bga-key-(10)

Step 7 Read and Write Key

Go to Read Write Key.

Click Identification key.

Reading data success.

Again, click Identification key.

Reading data success.

vvsi-mb-tool-add-bga-key-(11)

Click Load key file to get it. (here: key8_F7CCD165_used_051)

Click Write.

Writing data success.

vvsi-mb-tool-add-bga-key-(12)

Click Identification key.

Reading data success.

vvsi-mb-tool-add-bga-key-(13)

Add BGA key success.

Other successful case about vvdi mb tool:

Change EIS on W172, 204, 207....OK

Calculate EIS 221 password....OK

All key lost on W172, 204, 207....OK

Read and renew ELV on W204, 207, 212....OK

Renew EIS on W172 204 207....OK

Wednesday 23 December 2015

2015.12 Mercedes DAS Xentry on Win7 or Windows XP?

OBDEXPRESS has released 2015.12 STAR diagnostic software Win7 64bit for mercedes benz sd connect c4, and also the latest Das /XENTRY software available withmb star c3 diagnostic tool. V2015.12 mercedes star software based on win7 64bit run 300% faster than XP system version.
2015.12-mb-star-software-win 7-xp
2015.12 MB Software Win7 Highlights:
-work on Windows 7 (64 bit) or Windows XP
-faster and more stable than old version
-support multi-language:
Chinese: English, Croatian, Czech, Danish, Dutch, Finish, French, German, Greek, Hungarian, Italian, Japanese, Korean, Polish, Portuguese, Romanian, Russian, Spanish, Swedish, Turkish
-with 500G HDD or 256G SSD

SSD VS Common HDD in terms of running speed
(we test it on our DELL D630 PC)

4G SSD 4G HDD 1G SSD 1G HDD
boot time about 1min 30 Secs about 4 min about 3 Min 15 Secs about 5 Min
shutdown time about 20 Secs about 50 Secs about 22 Secs about 2 min
time to use Xentry test
one vehicle module
about 2 min 25 Secs about 3Min 27 Secs about 4 Min 28 Secs about 5 min 7 Secs
(Conclusion: 2015.12 sd c4 / c3 in SDD works faster than HDD.)

Mercedes software 2015.12 Win 7 version vs. MB Star XP version software

--Advantages:
1. This Software running upon Windows 7 64 bit systems, start-up time within 1min extremely fast
2. Win 7 star software compatible with most SATA interface laptops
--Disadvantages:
1. Some Win7 Star software- hhtwin can't work for S140 Classis diagnosis. (Mercedes cars before 1998 are not available)
2. Win7 Star software can not support WIFI, so wireless diagnosis or programming is not available.
3. For the StarFinder 2010, part of the circuit diagram can't display.
NOTE: all disabled functions above only can be achieved in win XP version.
4. 2015.12 Mercedes software win 7 version cannot do offline programming.
Choose 2012.11 / 2014.07 STAR software for online programming

2015.12 Mercedes Star Software features:
1. D-A-S / Xentry 2015.12: the automatically Diagnosis Assistance System ,Concise interface and straightforward operation with IB M high-quality computer can realize the quick and accurate code reading and the whole car system testing.
2. W-I-S net 2015.12: Workshop Information System Supply the whole view of the wiring diagram in a car,component location diagram and maintenance method. What you do is to enter the chassis number, and then you will get the manufacture data, engine configuration and the car model -all in detail.
3. EPC.net : Electronic Parts Catalog
4. ST Finder 2008:Part location finder
5. STARUTILITIES : the movement management system and self-test
6. SDMEDIA 2014
7. PL69

WHERE to get the newest software and star diagnostics?
MB STAR C3 MB SD C4
SDD SS163-AD12 SS162-AD12
HHD SS163-D12 SS162-D12

Software in SDD works faster than HDD

2015.12 Mercedes software display:
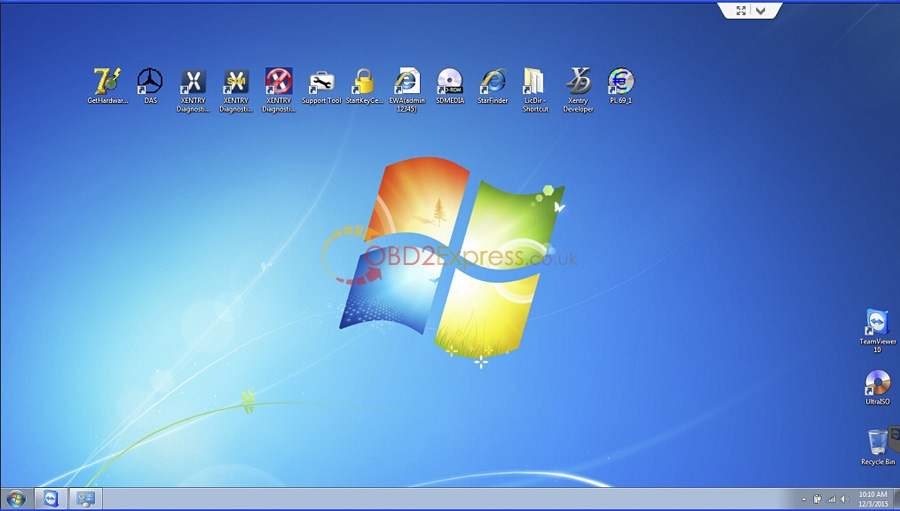
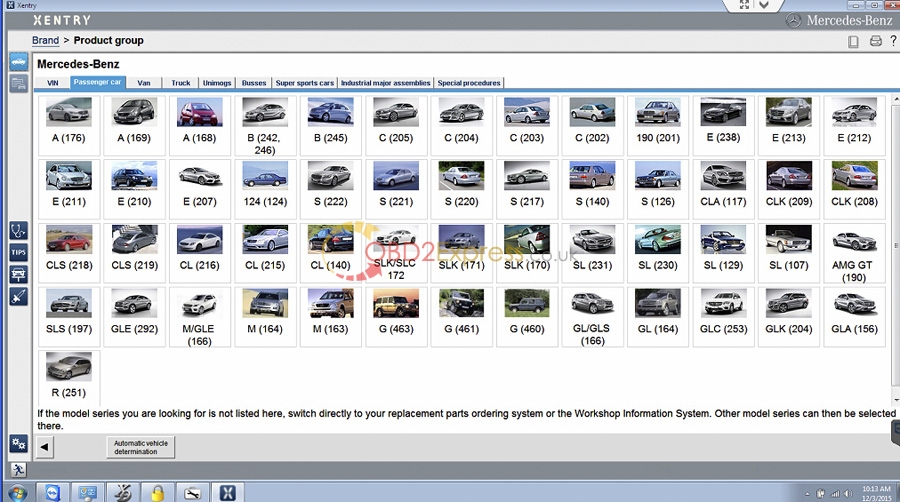
2015.12-mb-star-software-win 7-xp (1)

2015.12-mb-star-software-win 7-xp (2)

2015.12-mb-star-software-win 7-xp (3)

2015.12-mb-star-software-win 7-xp (4)

Thursday 10 December 2015

How to install JLR SDD V143 for VXDIAG VCX NANO

Come to learn how to install VXDIAG VCX NANO for Land Rover and Jaguar SDD V143.
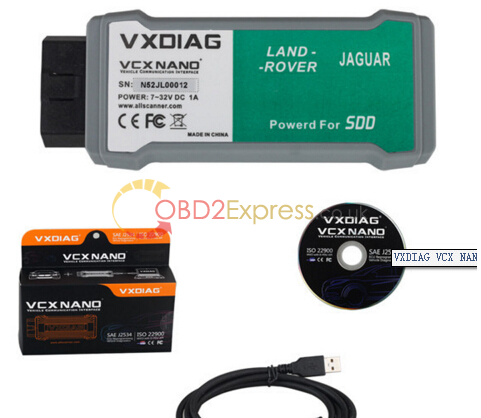
JLR SDD V143 for VXDIAG VCX NANO
Operation system:
Windows XP
JLR SDD installation guide:
Preparation
Part 1 Install SDD
Part 2 Install VDF_JA
Part 3 Install VDF_JV
Part 4 Install Additional Pinpoint Tests
Part 5 Install SDD 143.01.001
Part 6 Install VDF_LA
Part 7 Install VDF_LV
Part 8 Install VX Manager
Part 9 Install software for USB ...
Part 10 Install JLR SDD
Part 11 Run JLR SDD
Part I2 Install Deep Freeze
Preparation
Note: please disconnect the internet connection when installing and using JLR143.
Click the laptop icon on the Desktop menu bar to open network connection.
Disable all network connection Local Area Connection & Wireless Network Connection &....
Part 1 Install SDD
Open My Computer>>143-1(F:), to copy “Driver” “DF5td” “DFStd_KEY” to Desktop.
Open “SDD143.00_FULL”.
Select setup language to continue.
Click Yes to restart your computer.
Click Next.
Installing...
Click Next for installing SDD.
Select “I accept... agreement” and click Next.
Tick on “I have read and understand...” and click Next.
Destination: click Next.
Languages: click Next.
Click Install to begin installation.
Installing SDD...
Click Next to install M0XA UPort 1110/1130/1150 Windows Driver.
Destination location: click Next.
Start menu folder: click Next.
Click Install to begin installation.
Installing M0XA UPort 1110/1130/1150 Windows Driver.
Click Finish for installation of M0XA UPort 1110/1130/1150 Windows Driver.
Go on installing SDD...
Click Finish when successfully installing SDD and restart your computer.
Part 2 Install VDF_JA
Open My Computer>>143-1(F:)>>VDF_JA_143.
Choose setup language.
Installing...
Click Finish after successfully installing VDF_JA.
Part 3 Install VDF_JV
Close all the interface, and reopen My Computer>>143-2(F:)>>VDF_JV_143.
Choose setup language.
Installing...
Click Finish after successfully installing VDF_JV.
Part 4 Install Additional Pinpoint Tests
Open My Computer>>143-2(F:)>>SPA_143.
Prompt: Additional Pinpoint Tests will be installed as a background task. Click OK.
Installing Additional Pinpoint Tests.... (wait for about 1 hour)
Click Finish after installing Additional Pinpoint Tests.
Part 5 Install SDD 143.01.001
Close all the interface, and reopen My Computer>>143-3(F:)>>SDD 143.01.
Click Yes to restart your computer.
Installing SDD 143.01...
Click Finish after installing SDD 143.01.001, and restart your computer.
Part 6 Install VDF_LA
Close all the interface, and reopen My Computer>>143-3(F:)>>VDF_LA_143.
Choose setup language.
Installing...
Click Finish after installing VDF_LA.
Part 7 Install VDF_LV
Open My Computer>>143-3(F:)>>VDF_LV_143.
Choose setup language.
Installing...
Click Finish after installing VDF_LV.
Part 8 Install VX Manager
Open Driver on Desktop, then to open VX Manager1.0.5.0612.
Click Next to install VX Manager1.0.5.0612.
Click “I accept the agreement” and Next.
Click Next.
Installing VX Manager...
Installing VCX SDK Driver...
Click Close when installation complete.
Click Finish when VX Manager is installed successfully.
Restart your computer.
Part 9 Install software for USB ...
Found New Hardware Wizard: click Next, with selection of “Install...(Recommend)”.
Installing...
Click Finish for installing software for USB Serial Converter.
Found New Hardware Wizard: click Next, with selection of “Install...(Recommend)”.
Installing...
Click Finish for installing software for USB Serial Port.
Right click My Computer for Manage.
Select Device Manager>>Ports (COM&LPT)>>USB Serial Port (COM4).
Then close computer management.
Part 10 Install JLR SDD
Open VX Manager on Desktop.
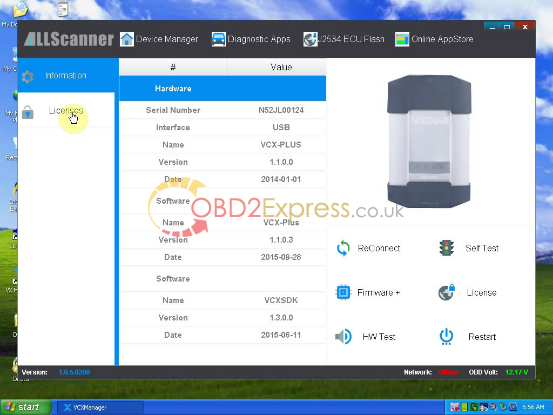
JLR SDD V143 for VXDIAG VCX NANO-1
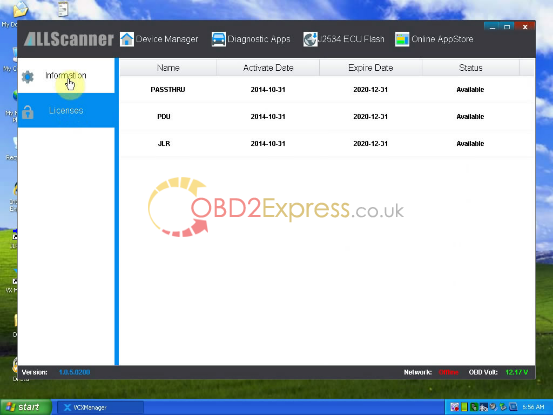
Click License to read and then back to Information.
JLR SDD V143 for VXDIAG VCX NANO-2
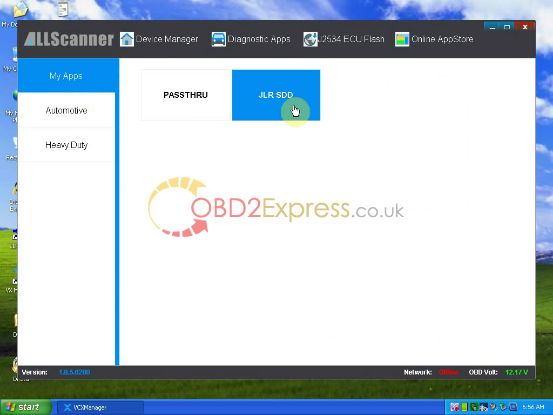
Select Diagnostic Apps>>My Apps>>JLR SDD.
JLR SDD V143 for VXDIAG VCX NANO-3
Click Install.
Click Close when installation complete.
Close all the interfaces.
Part 11 Run JLR SDD
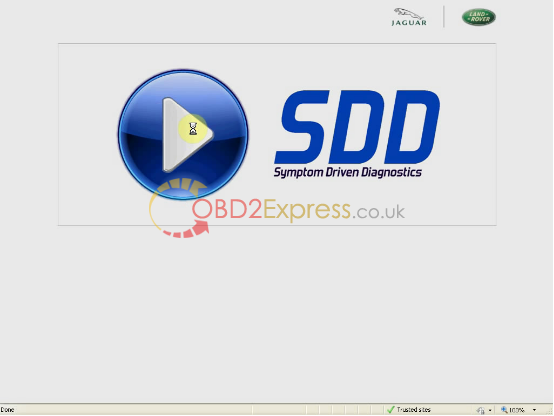
Open JLR SDD on Desktop.
Close Setup Windows Internet Explorer 8 interface.
Internet Explorer - Search Provider Default: click OK.
Manage Add-ons: click Close.
Loading...
JLR SDD V143 for VXDIAG VCX NANO-4
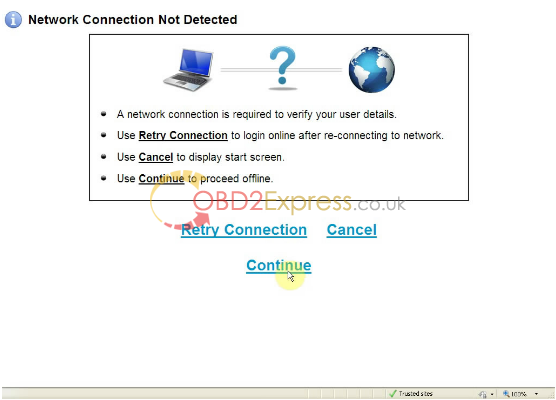
Click Continue.
JLR SDD V143 for VXDIAG VCX NANO-5
Click Continue.
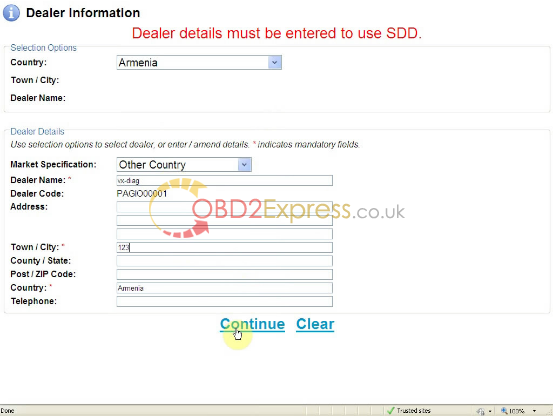
Enter dealer information and click Continue.
JLR SDD V143 for VXDIAG VCX NANO-6
SDD warning: click Continue.
Click Proceed with SDD.
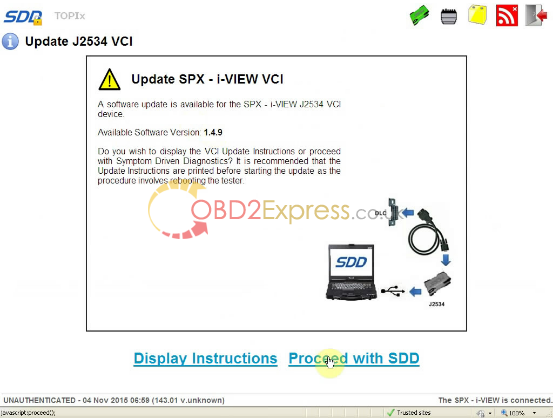
JLR SDD V143 for VXDIAG VCX NANO-7
Enter VIN, and click Identify Vehicle.
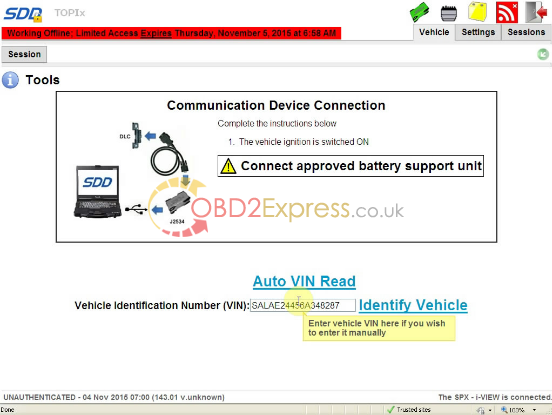
JLR SDD V143 for VXDIAG VCX NANO-8
Click Proceed with SDD.
Select Low line instrument cluster, and save data.
Click Diagnosis.
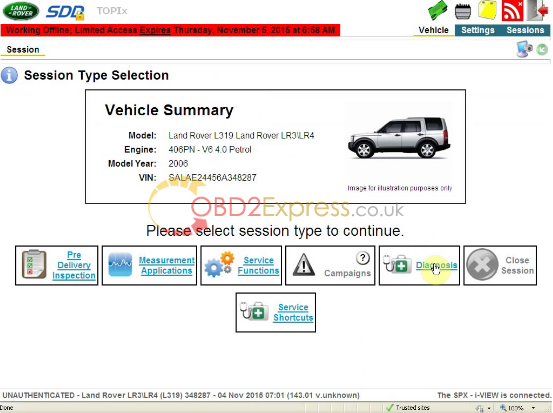
JLR SDD V143 for VXDIAG VCX NANO-9
Select Powertrain>>Engine system>>Engine cooling, and click Continue.
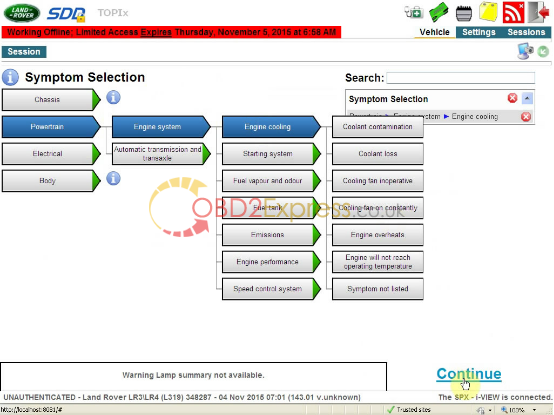
JLR SDD V143 for VXDIAG VCX NANO-10
Select CAN_HS>>PCI>>Rerun data collect for this module.
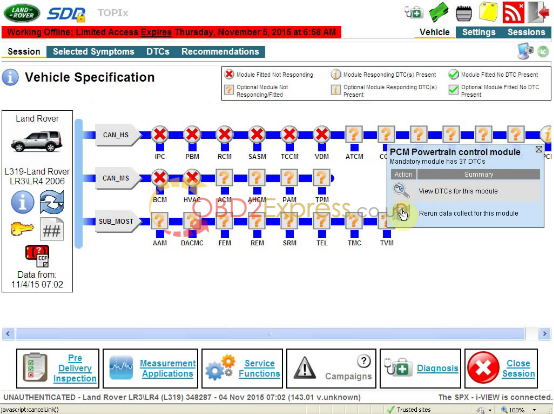
JLR SDD V143 for VXDIAG VCX NANO-11
Click Diagnosis at the bottom.
Click Continue.
Loading recommended candidates...
Close the interface .
JLR Application Launcher: select Stop Application.
Part I2 Install Deep Freeze
Open “DFStd” on Desktop.
Click Next.
Click “I accept...agreement” to go on.
Open “DFStd_KEY” on Desktop, to copy the license key for entering. Click Next.
Click Next, with the only selection of C: (cancel ticks on D: & E:)
Click Install.
Then restart your computer after installation Deep Freeze.
Done!
Top 5 Reasons to get VXDIAG VCX NANO:
1. Replacement of OEM tool of SPX VCM and i-VIEW
2. Support all protocols of Land rover and Jaguar
3.Multi-languages:English/Japanese/Portuguese/Romanian/Korean/Dutch/Polish/Turkish/Spanish/French/Italian/Croatian/Danish/German/Swedish/Finnish/Slovenian/Czech/Russian/Greek/Chinese
4. Supported Car Models: Diesel and gasoline cars
5. Update by CD, without firmware locked

Sunday 6 December 2015

VVDI MB TOOL first released at obd2express!!

Hello, Xhorse VVDI MB TOOL BAG key programmer has been out at obdexpress now!! VVDI MB TOOL package, software, tested results will be offered here.

The package here,
including the Mercedes Benz VVDI main unit, some cables and adapters.
PCB:
VVDI MB BGA TOOL Function:
1.support BE key,read password and prepare new key via IR.
2.NEC V051,V057 support on board get password
3.All NEC keys support on board write and erase
4.password calculate:support BGA keys,NEC keys(include 51,57version)etc.,work fast.
5.support renew EIS and ELV
6.support write EIS and ELV
7.support online generate key file
8.unlock ELV function will be released soon.
9.will support the function of renew other control modules soon

VVDI MB BGA TOOL software display:
Language: English and Chinese

VVDI MB BGA TOOL English Version:


VVDI MB BGA TOOL Chinese Version:


VVDI mb tool tested successfully:
- calculate 221EIS password... work fine
- add key (20 minutes for one):
E300L...work fine
R500 4 matic...work fine
CLS260...work fine
S320...work fine
E260...work fine

Model support IR/OBD:
W164, W164 2009+
A166, W197,W212, W218, A246
A169, W209, W211
W172, W204, A207
W203
W204, W207, W212 only by dump
W209 only by dump
W210
W215, W220
W230
W216
W221
W906

Keys version supported:
v03, v06, v08
v05, v07, v09
v59,v61

Note:
Two adapters: one for versions 28, 35, 40, 51, 57, another one for version 59.
Extra pay for the adapters.

Tuesday 1 December 2015

(Solved) INPA Error IFH-0009: NO RESPONSE FROM CONTROL UNIT

INPA error IFH-0009 No Response usually means a break down (or lack of) communication between the vehicle itself, and the laptop. More often than not, IFH-0009 errors in INPA are caused by the following reasons.

The hardware for INPA can be:
BMW ICOM A2;
INPA KDCAN USB cable;
EDIABAS OBDII interface;

1) Poor quality, or incorrectly wired interfaces. IFH-0009 errors are the most common in D-Can+K usb interface leads. Often these low-quality can be badly constructed, incorrectly wired, or contain the wrong chip set drivers or come with no drivers at all!. Whilst not all Chinese interfaces are poor quality, buying cheap imported leads is a gamble and when problems occur the seller probably won’t be interested. It is therefore important that you buy an interface lead from a good quality, reputable Vendor.

2) Wrong or Incorrect Interface Drivers. Again, mass produced interfaces can often contain cd’s with the wrong chipset drivers or come with no CD at all. Without the correct (latest) USB drivers, your interface lead will not install under windows properly. Our software package comes complete with a popular driver which is compatible with most Chinese and Western produced USB Interfaces, which will often work if the one supplied from your interface lead vendor doesn’t or hasn’t been included.

3) Incorrectly configured interface lead. Again, one of the most common problems with USB type leads. When installing a D-Can or Usb Interface lead, you will need to reconfigure the Windows based com port settings, so that the USB lead, appears to replicate an old RS-232 serial port. To replicate the port correctly, you need to change the existing Com port setting of the USB interface within Windows to Com Port 1 and change the latency setting to ‘1′ and check any ‘Fifo’ box

4) Incorrectly wired interface. Once again, there is no set standard as to the wiring pin configurations used within D-Can + K interfaces, by the various manufacturers. Some interface leads have pin 8 disconnected, some have pin 8 physically linked (bridged) to Pin 7, and some have pin 7 & 8 connected individually with no bridge link. If you still have problems connecting to the vehicle, and still get ‘IFH’ style errors then you should open the OBD Socket of the lead and check the pin wiring to see which type of interface you have. You should consider trying your interface lead, with the following configurations….

i) Pin 8 joined to Pin 7 using a small wire link

ii) Pin 8 physically disconnected

iii) Pin 7 and Pin 8 individually connected to their own pins with no link.

More often than not, one of these configurations will work with your vehicle, I recommend trying it with pins 7 & 8 linked together first, as this is by far the most popular vehicle configuration.

Also don’t assume that once you have found the pin 8 solution which works with one vehicle, that it will automatically work with a different model. If you have more than one D-Can equipped vehicle, you may need to obtain a second interface lead and configure ‘pin 8′ differently.

If you don’t own a soldering iron, or if you don’t feel confident about soldering electrical connectors, then there are adaptors available which will bridge pins 7 & 8 together, without any need to open the OBD socket or solder.

5) Incomplete Versions of INPA. There are many versions of Inpa around, many of which are incomplete or simply lack the various configuration files in which to work correctly. If you try all of the above and the IFH-0009 problem still remains, then you will need to consider buying and installing the full version of Inpa which includes Ediabas and BMW Standard Tools

Real case solved by one of solutions above:
Background:
1. I have a 2004 325ci

2. I purchased the ebay cable here. It is an under-the-dash OBD to USB cable.

3. It came with what was described as INPA 5.02 and EDIABAS 6.4.7. You have to install BMW Tools first, and then update. (Updating INPA, it shows a check mark next to INPA 5.01 "update," and loading INPA, it says version 5.00 at the top bar.) I also installed NCSExpert.

4. I am using windows XP SP3 32 bit. Firewall disabled, no anti-virus. No other software is installed. (I've had the same problem using Win 7 and Vista).

5. C:\Ediabas\bin is in the path.

6. Installed the USB cable and set the COM port to 1. Latency is set to 1ms. There is no option to use FIFO buffer.

7. Ediabas.ini has STD:OBD as interface. It is also set so loadwinxp = 1

8. OBD.INI is in C:\ediabas\bin and \system32. COM port is set to 1 and hardware = USB (when hardware = OBD the battery circle is black even when not plugged into the car).

9. When loading INPA, I get black battery and ignition when plugged in and starting car.

10. I can successfully read the ECU. I can read and clear errors.

11. When trying to read any other module, I get the IFH 0009 No Response From Control Unit.

How to solved:
I took about the connector and pins 7 and 8 are indeed soldered together!

I verified that both pins 7 and 8 had voltage and that the connection from the chassis wires to the obd plug under the dash were solid.

I then looked closely at pin #8 on the OBD/USB wire and noticed that it was bent slightly. It was not lining up in the pin #8 slot! I straightened it out and it worked!

Friday 27 November 2015

Easycoding for BMW and Rolls-Royce V1.4.0.151112 software download

Easycoding for BMW and Rolls-Royce new release V1.4.0.151112 software

Here is the software download link: ftp://ftp.ucandas.net/

With this update, it new add the following:
1. Online Upgrading Module is added.
2. VIN database of BMW is renewed to October of 2015.
3. VO modification function is added .
4. Single system CODING function is added which makes CODING available on new or used  ECUs.
5.  DEMO function is added.
6. Perfectly solve programming version after 2015.2 can not brush hidden problem.
7. Software presentation capabilities and online upgrades.

Personalization features
Visualization for commonly used BMW personalized settings, simple operation, support the restoration of the original state function, modify security.

Modify the original car VO function.
It needs modify VO when you change low configuration for BMW to higher. Compared with expert version, this one new adds interpretation function for original VO.

Single system design code function
Support code matching function when you replace a new or second-hand ECU. Modified VO system also needs to be coded to take effect.

More information: http://www.obdexpress.co.uk/wholesale/easycoding-bmw-rolls-royce-diagnose-personalized-setting.html

Wednesday 25 November 2015

What is the difference for all KESS V2 series

OBDexpress.co.uk is selling a series of kess v2,they have own special features, how to choose the best for your car, what is the difference for all KESS V2 series,Look at the following table:
More information:http://www.obdexpress.co.uk/producttags/kess-v2.html

Friday 6 November 2015

(Solved) Mercedes W203 EDC16C2 ECU problem not crank and not read on BDM

This post begins with Mercedes W203 EDC16C2 ECU problem that MPC556LF8MZP40 wont crank and ecu not possible to read on BDM, and finally solve the problem. To know how to solve this problem, go on reading.

Car model and year:
MERCEDES W203 EDC16C2 ecu 0281012451 A6461504091.
IT HAS EXTERNAL EEPROM EXTERNAL FLASH AND MPC.

Problem:
Ecu has problem with MPC556LF8MZP40.
It wont cranck untill you heat mpc little bit. Around 20C.
Also ecu is not possible to read on BDM. It cant recognize it.

What tool used to test?
Tested with FGTech Galletto and BDM100 ECU programmer

Detailed problem description:
So I found DUMPS on forum readed with DIMSPORT.
Because i am not sure that dumps are ok, i have to program them in to another same cu from W211 so i can test it on mercedes w203.
After programming W211 ecu with BDM100 in dimsport software i use external eeprom from W203 ecu and program it in w211 ecu.
I test it on car and everything went fine. Car start and no fault (checked with DAS).
After testing i use GALETTO and read w211 ecu and save files. So i have files that work.
Then i start to searcH for used MPC556LF8MZP40, and i found it in FORD FOCUS EDC16 working ECU.
I resolder it from ford ecu and re-ball it and solder it on mercedes w203 ecu. I connect it with GALETTO and finally i can connect it.
When i look better i saw that eeprom PROGRAMM and READ options are disable.
So i was thinking ok that was wrong dump inside MPC and i start with programming MPC. After programming MPC i restart the ecu and same problem.
OK i have to program also external FLASH and MPC. Maybe that could be the problem.
After programming MPC and flash i have still the same situation. Not possible to read and program external EEPROM.

Finally, Solved!!!
Problem was bad mpc. When i heat it littlebit i get access to the eeprom. i replace new mpc and now cor run smootlhy.

Thursday 10 September 2015

What’s the difference of the VVDI 2 and VVDI Prog?

Xhorse Tech has newly released two powerful OBD tools: VVDI Prog and VVDI 2. What’s the difference between VAG Vehicle Diagnostic Interface VVDI2 and VVDI-Prog?

Xhorse VVDI 2 VVDI II Key Programmer
Xhorse VVDI prog Super programmer
Major difference:
(detail comparison, please check table below)
VVDI 2 is the update version for VVDI (Item number SV30), it inherited VVDI all features, mainly used to diagnose, programming ECU and keys and so on. VVDI2 added other features:

VVDI 2=VVDI options + BMW Multi Tool options+Porsche options+J2534(free)+ Tango(free)+Remote control generation(free).....more other function

While VVDI prog is a newly developed ECU programmer mainly for EEPROM ECU, MCU programming and pin code calculation.

VVDI PROG=(BMW ISN READ)+(EERPOM read)+(mcu read MOTO 9S12,5M48****)+PIN Code Calculation(more pin coder Algorithm ,than 40 type)

In short, VVDI 2 is a comprehensive OBD tool for diagnose and programming (program ECU and program keys). VVDI Prog turns to be an car ECU programmer.

Free download:
Xhorse VVDI 2 software installation user manual
Xhorse VVDI 2 software update instruction
Xhorse VVDI 2 overview

How to install VVDI-Prog2.1.0 software obd2express.co.uk
http://www.dailymotion.com/video/x3345jl_how-to-install-vvdi-prog2-1-0-software-obd2express-co-uk_auto

Wednesday 9 September 2015

2015 Original Xhorse VVDI PRO VVDI 2 VVDI II

Original Xhorse VVDI 2 or VVDI PRO—the second generation VVDI (VAG Vehicle Diagnostic Interface) is available in obdexpress.co.uk.

VVDI2 inherited all VVDI features& functions. What’s more, VVDI 2 newly developed some advanced features that make it a more powerful OBD tool.

VVDI2=VVDI options + BMW Multi Tool options+Porsche options+J2534(free)+ Tango(free)+Remote control generation(free).....more other function.

VVDI 2/VVDI PRO Top features:
1) Including all VVDI functions, improved and more stable
2) More vehicle coverage, multi Immo functions
3) New added plug-in function and reserved connectors to include all VVDI functions
4) VVDI PROG includes all the VVDI functions, The function of Tango, Remote control generation and chip identification is improved, And also the coil’s stability has been enhanced.
5) Do not need to connect VVDI Pro with computer to identify chip or detect remote frequently.
6) Add more vehicle models
VVDI supports diagnostic function only for VAG groups, But VVDI PROG has achieved multi brand vehicle diagnosis and supports part of vehicle immo programming function and software online upgrade.

VVDI PROG can replace lots of customized devices. Users do not need to purchase specific OBD tool for specific vehicle makes which will save you a lot.

7) Plug-in function, reserved connectors
VVDI 2 can act as a multifunction programmer to connect plug-ins, and read & write IC and CPU data.
Can read and write Benz IR key, Can program key for old and new Mercedes–Benz, Can connect BMW plug to realize OBD function, And meanwhile reserve some connectors for further uses.
The core function is to detect the remote control frequency;
Automatically identify chip type
Support multi-function on VW vehicles
Read BMW ISN
Key programmer
Remote control programmer
J2534 compatible adapter

VVDI II Functions:
1.Detect key frequency, automatically identify chip type
The test result can show on the main unit display, no need to connect computer
2. Support VAG vehicle diagnostic function
Read & write Immo4/Immo5 system
Learn key
Program BCM remote
K-Line instrument immobilizer box
Correct odometer
Program control unit
Unlock Immo1/Immo2 firmware protection
Support data manipulation tools

3.Support OBD functions on BMW vehicles.
Correct odometer
Generate key
Unlock Key
Fix CAS4 EEPROM key programmer
Generate specialized chips
Immobilizer data processing tool
Other key tools
Generate remote control

4. Pass-thru J2534 Function
With built-in switch matrix, it supports third-party diagnostic software including: ODIS, Toyota TIS techstream etc. To perform VVDI2 diagnostic function, third-party diagnostic software should be compatible with J2534 function.

VVDI2 example in action:
VVDI Program Porsche key
VVDI PRO key programmer program Audi key

Thursday 9 April 2015

How to lower Jaguar X350 air suspension with JLR mangoose SDD

Here is the inscription on resetting air suspension value for Jaguar X350 with Jaguar and Land Rover JLR mangoose SDD diagnostic system or Ford VCM II IDS / SDD for Ford, Jaguar and Land rover.

NOTE:
Before re-calibrate air suspension value, you need to fit some longer rods to the height sensors and some shims under the mounting brackets of the height sensors.
Equipments:
JLR mangoose SDD OBD II diagnostic interface or Ford VCM2 IDS / SDD for Ford and JLR
A laptop running Win XP home
Instruction:
Well install Mangoose SDD software
Connect the mangoose cable with vehicle via OBD socket
Wait the SDD to read VIN automatically and display vehicle information
Run an though scan of the car, and go to "Service Function" program
Locate "Air Suspension calibration" option on the list

Turn ignition OFF
Turn ignition ON and start the engine
Wait the SDD levels out and adjusts the suspension, the SDD software will pops out "Air suspension leveling in progress" notice. The compressor will run and the shocks fill and bleed. Finally, it will level out the correct ride height.

Measure the distance from the centre of each wheel to the apex of the each wheelarch in millimeters using the ride height gauge 204-484 For example:. Front at 386mm and the rear at 373mm, write down these numbers.
If the car is not sting at this height, it needs to be calibrated to the factory settings. If it is correct set, you can start calibrate the suspension.
Follow the picture below to measure the ride height

If you do not have this tool, you can measure the ride height using tape measure from the inside edge of the wheel arch, this is not the same as the outside edge. Remove the center caps from the wheels. The growler has a line exactly in the middle if you turn it 90 ° which makes measuring easier.

The Ford IDS will prompt you to enter the front left ride height value in mm, to add the amount that you want to lower the car compared to the factory setting.
Example, if you want to lower the front by 15mm, to 371mm, and the front is actually at the factory height of 386mm, then enter 401mm into the VCM IDS. Measure the other side and add the same amount. After you measure 4 corners , the car will go through a leveling cycle and adjust to the new height.
Continue to measure all four corners follow the same procedure above.
Once again you have to enter values ​​into the IDS, by adding the amount you want to lower the car.
Follow the above reference, you should now be measuring 371mm, add 15mm to it & enter 386mm (factory value).
The IDS will report "The air suspension unit has calibrated successfully" when is completed.
Have a check of your car
Exit JLR SDD or VCM2 IDS / SDD software program.
Disconnect mangoose cable or Ford VCM2 for Ford and JLR diagnostic system from vehicle.