UK SHIP, NO TAX

Thursday, 12 June 2014

How to solve Toyota P0031 & Check Engine Light on

The Toyota Camry came back again for reparation, which had been repaired for several times because the CEL was on. Strangely enough, the car works well without other abnormalities.
Facing this thorny issue, this time I tended to apply V2014.6 Toyota Intelligent Tester 2 IT2 with Suzuki, the SUZUK company professional diagnostic tool for the Suzuki car. I first connected IT2 into the Powertrain / Engine and ECT / DTC, reading the error code P0031 (HO2S heater control circuit low), while the DTC's frame data found no error. According to the maintenance manual, the causes of P0031 are: A / F sensor heater circuit broken; A / F sensor heater (sensor1) fault; engine J/ B (EFI relay) fault; ECM failure, etc.
toyota intelligent tester 2
1) I disconnected C15A / F sensor connector to measure resistance of C15-1 and C15-2 terminal ( A / F sensor heater + B and HT terminals), reaches 2.6Ω, within the normal range (1.8 ~ 3.4Ω); moreover, resistance between C15-1 (HT) and C15-4 (AF-) terminals is infinite, normal. So A / F sensor failure can be excluded.
2) Then I turned on the ignition and measured voltage between the C15-2 (+ B) terminal and the bonding, which is 12.7V, normal. This will initially rule out the A / F sensor circuit fault.
3) According to the system circuit diagram, the resistance between C15-1 (HT) terminal and ECM C24-109 (HAlA) is 0.24Ω, and between C15-1 and the bonding is infinite, indicating that A / F sensor heater with ECM lines is normal. Considering that the fault occurred intermittently, I cleared the code and tested, however, CEL lighted again when the vehicle was driven on a relatively bumpy road.
4) Back to the shop, I found the code was still P0031 re-read by car diagnostic tool IT2. Then I entered Utility (Tools) / CheckMode, which will transfer ECM from normal mode to check mode, afterwards, shaking relevant components. When shaking J / B, CEL light up again. It turned up in several tests, so it can be determined as the J / B-related failures.
Finally, I removed J / B and pulled 1E, the plug was found in corrosion. Combined circuit diagram, 1E-7 is the very power line of A / F sensor heater. I dealt with the corrosion, the fault was completely cleared after repeated test.
http://www.obd365.com/wholesale/digimaster-3-digimaster-iii-original-odometer-correction-master-with-980-tokens-2253.html

Wednesday, 28 May 2014

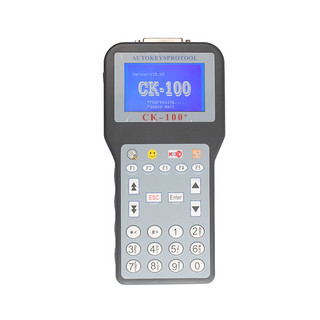
CK-100 Auto Key Programmer Reviews

My friend has a SBB key programmer; he says it has an upgrading one: CK-100, CK-100 V99.99 is better than SBB key programmer. Then I got one from obd365 about 150 dollars, not expensive. CK-100 supports English, Italian, Dutch, French, Spanish, Portuguese, and Turkish. It has more languages, so it's easier for different users from worldwide.

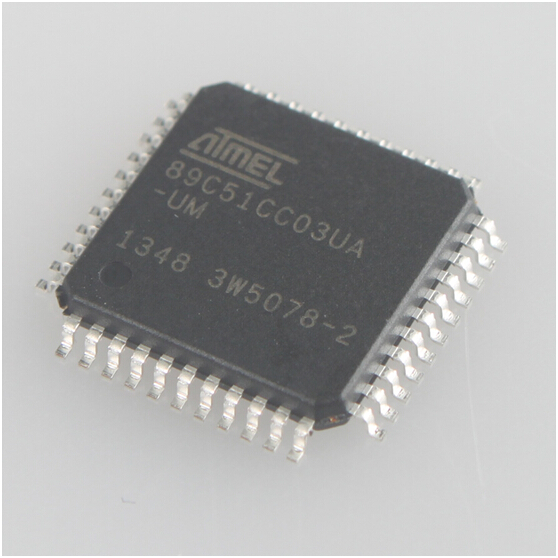
He used it to program keys for his Audi and I programmed 2 cars (Acura and Chrysler). It worked well. CK-100 needs tokens and it has only 1024 tokens. I cannot add tokens online, but buy an AT89C51CC03U NXP Fix Chip and directly replace the old board with the new one, then CLK100 will have more 1024 tokens.
NXP fix Chip for Ck-100 V99.99
I wanted to use this tool to program Toyota chip G. But I was suggested to use FVDI and after tested it can work. The shortage of CK-100 is that it cannot update online which is a little bit trouble, but it is cheap, so it deserves its value.

Thursday, 22 May 2014

How to Reprogram a Car Key


Introduced in the 1990s, electronic keys can be programmed to your car's engine to offer extra convenience and security for your vehicle. These keys, also known as chip keys or transponder keys with CK-100 V99.99, are synced to your starter. Once they are programmed, they are the only keys that can start your car's ignition. You can reprogram lost signals from your driver's seat, in just minutes, as long as you have two programmed keys.

Enter your car with your two programmed keys and your new, unprogrammed key.

Insert the first programmed key into the ignition. Turn it to the "On" position, and then back to the "Off" position.

Remove the first key and insert the second key within five seconds.

Turn the second key "On" and then back "Off." Remove the key.

Insert the new key with VPC-100 within 10 seconds and turn it to the "On" position for one second. Return it to the "Off" position.

Wait for the security light to turn on and stay on for three seconds before removing the new key. The reprogramming is now finished.

Friday, 9 May 2014

Review on SVDI VAG Commander

Early this year OBD365 sent me an email about their new arrivals, among which I saw SVDI VAG. I had heard about this tool recently. Since their price was reasonable, I finally decided to give a shot. I ordered one from its official website SVDI VAG Commander 19+BMW Commander+Immoplus+Tag Key Tool for US$599.99. By far I have had the tool for nearly a month. Here I would like to share my reviews.

First things first, I can tell you that the tool really works. I have reset an Audi A6 service light and clear a 08 VW PASSAT 2.0airbag crash data with the tool. I also have successfully used it to program ECUs for a VW and a Skoda.

Besides, different from other VW diagnostic tools I have used before, SVDI is compatiable with both gasoline and diesel cars and trucks. That is just what I need.

About its quality and abaility, I have exchanged views with some mechanic friends who purchases SVDI from real stores. It is a lot cheaper than those SVDI commanders sold in auto repair shops, but according to my friends, it works as good as those ones.

Friday, 25 April 2014

How to Get Pincode of 7 Car Brands

When program keys for some cars, it is necessary to put in pincode for the car key programmer without reading pincode function. Here shows you 7 car brands getting pincode methods.

1. VW
1) VW models from 1994 to 1997, chip keys are composed by copied chips. 4 digit numbers is provided by the manufacturer to the user together with the original keys in hand.

2) Volkswagen from 1997 to 2000 have the chips cannot be copied. 4 digit numbers is provided by the manufacturer to the user together with the original keys in hand.

3) 2000 - 2001 Volkswagenon their own 4-digit password retention, available to customers only if the customer requests a password.

4) Since 2002, the factory of VW is only available to customers with a 7 -digit code, changing every day, vehicle anti-theft computer recognize only a 4-digit password; thus SILCA Software Company has developed a 7-digit code can be converted to 4 digit password.

5) The use of special equipment can read out pincode, such pincode reader or calculator

2. Opel

Car manufacturer provides owners three groups of password: car audio password, the key tooth code and pincode.

If the car owner lost the security password, he/she could use the ID number to ask from the manufacturer. Besides, read out by using special anti-theft device password.

3. Citroen

Manufacturer gives the owner a small card with a 4-digit password on it. if owners get lost password, they could get from manufacturers by providing the ID number for PINCODE: XRR7RENAULT. In front of the door using the manual password is IMMOBILIZER password. What is more, use special equipment to find security code

4. Nissan

Nissan made before 2003, the password is: 5523; while cars after 2003 should be calculated by special calculators, and converse serial number.

5. Honda
All Honda does not require a password.

6. Toyota
All Toyota does not require a password.

7. Hyundai
The first generation IMMO password has three types: the rest 4 serial numbers, 0000 or 2345.

The second generation IMMO is a group of six-digit password, inquiry dealer.

The third -generation anti-theft system (green primary key) can be matched directly with the decoder.http://www.obdii365.com

Thursday, 17 April 2014

A not bad experience with troubleshooting MINI DSG problem

A not bad experience with troubleshooting MINI DSG problem
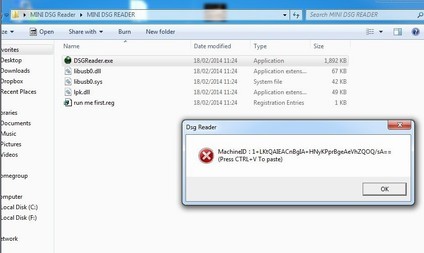
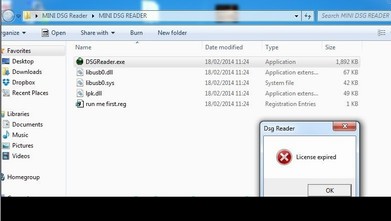
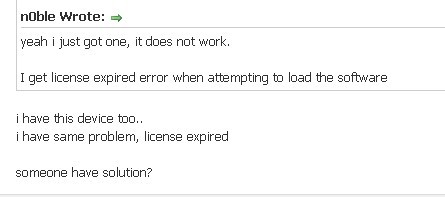
I was confused with why my MINI DSG informed me license expired error when I installed its software, error/information pictures show as follow:
mini dsg software error
I got troubleshoot method from the combination of net friends and my seller customer service from obd365.com:
Solutions:
Step1: send my mini dsg hardware id/sn to my seller for calculating the software license
Step2: copy the software license to the dsg folder and try to run software with the hardware plugged in
Step3: it has already done.
According to my purchasing experience, I got that if you do not know much about one product/thing, you could have a search online to find useful information for internet now is very easy to access to. And other side is that better make good use of customer service, for customer service and product quality is the most important part to a company.
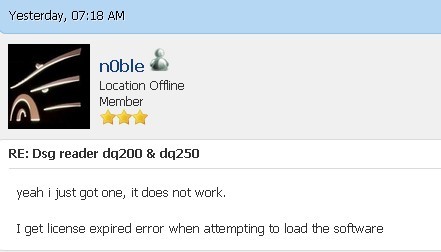
When I got license expired problem on MINI DSG, I made good use of two. First of all, I search online and find a forum post about it, show as picture below:
search internet
search internet
As I read them, I got to know that it is common problem among users. Therefore I turned to my customer service in obd365.com, and had my problem solved.
That is all my experience about troubleshooting DSG license expired, and to some extent, it is a not bad experience for I knew better on making good use of internet resource and customer service help.

Wednesday, 9 April 2014

Diagnose Honda CRV With No Spark

The Honda CRV uses a distributor cap and rotor assembly to supply power to the spark plugs to ignite fuel. An engine NEXIQ 125032 needs three things to run: fuel, spark, and compression. For fuel, this means a proper air-to-fuel mixture. For the CRV, this is 14.7 parts air to 1 part gasoline. Compression refers to the compression inside the engine cylinders. If there is a leak in the engine block where air can escape, then there will be a loss of compression. Spark refers to the electrical spark generated by the distributor system. When you aren't getting spark on your CRV, you'll need to troubleshoot the problem.
Remove the spark plug wires by pulling them up out of the top of the engine. You may need to wiggle them from side to side a bit, but they should pull straight up out of the top of the engine.
Remove the spark plugs. Attach the spark plug socket to the extension and lower it into each spark plug well. Grab the top of the spark plug and turn the socket and plug counterclockwise with a socket wrench.

Pull each spark plug out of its spark plug well along with the spark plug socket.
Pull the spark plug out of the spark plug socket and insert the plug into the open end of the spark plug wire with the electrode on the spark plug facing out. Do this for all of the spark plugs. Insert each plug into its respective plug wire with the electrode facing outward.

Crank the engine the key pro m8 and have an assistant check for a solid blue arc between the electrodes on the spark plugs. If there is a solid blue arc on every plug, then you have no spark issues. If there is no spark, then remove the spark plugs from the spark plug wires.

Insert a long screwdriver into the open end of the spark plug. Lay the screwdriver down next to a metal screw on the engine. Crank the engine again and have an assistant check for spark. If there is a spark, the spark plugs are bad. If there is no spark, then pull the spark plug wires off the end of the distributor. They should pull right off the distributor.

Place the metal part of the screwdriver next to the electrodes on the distributor. Crank the engine again. If there is no spark, then the problem is with the distributor. If there is spark, but there was no spark during the plug wire check, then the problem may be the spark plug wires. The spark plugs themselves---unless there is corrosion or visible damage to the electrodes, or the plugs have over 30,000 miles---are likely not the issue.